

Growing Bacteria in Agar Activity with Free Lesson Printable
Sharing is caring!

The ever-popular growing bacteria in agar activity is eye-opening, fascinating, and well, kind of disgusting! But it’s an activity I highly recommend for all ages. There is much to learn!
We used this kit which comes with the agar already pre-made and in petri (pitri) dishes and includes swabs. You will want to gather extra swabs and disposable gloves.

(High school content for this activity is in a separate document from the lesson printable. Both request forms are at the bottom of this post. The information in the PDF goes into more detail about bateria, antiseptics, and disinfectants. )
Not wearing shoes in the house is a big pet peeve of mine, and despite the kind reminder on the garage door mat, shoes still make it into our house sometimes. So, since we had the bacteria growing kit, we decided to end the great debate – “How much bacteria comes in on the bottom of shoes?”
We have put together a detailed lesson and printable. Some of the information may be above your child’s grade level, and some of the pages in the printable are geared towards the youngest scientists.
You will want to also check out our other printable on germs and the immune system . If you have elementary-age children, use this agar activity and printable with t he germ printable . You may also want to check out this make-a-mold-terrarium activity too.
My advice is to download the printable and use what works for your homeschool or classroom. Regardless of grade level, everyone will have fun swabbing different surfaces and watching the results grow!
Please note, this post contains affiliate links.
Table of Contents
Growing bacteria in agar petri dishes- what is microbiology.
Let’s review some microbiology background before we start growing bacteria in agar.
When most people think of the word “biology,” they think about all the amazing living beings they have seen. from the magnificent matriarchal herds of elephants to the gentle sea turtles floating through our oceans’ currents, even down to the humble dandelions that brighten up city sidewalks.
But biology is the study of all living things, and not all living things can be seen, at least with the naked eye. That’s right, there is a whole society of organisms living right under our noses – literally!

The study of these incredibly small living organisms is composed of two words, micro meaning “small” and biology meaning “the study of living things. So. this means that microbiology is the study of small living things, and that is exactly what we will be talking about in this lesson.

Salmonella bacteria under an electron microscope.

Actinomycetes bacteria under an electron microscope.
Why Study the Small Stuff & Grow Bacteria in Agar?
There are many reasons to study microbial life, both the good and the bad.
Pathogenic organisms, organisms like bacteria, viruses, cysts that cause diseases such as meningitis or tetanus, are some of the most famous microbes. We have to study them in order to understand the course of their infection, what medicines they are vulnerable to, and how they may be transmitted throughout human societies.
But, while many people believe bacteria and other microbes to be dangerous, gross, and overall undesirable, we actually cannot live without them.
There is an unending list of benefits that they provide for other living organisms, including humans, elephants, sea turtles, and even dandelions stuck in sidewalks.
Reasons Why We Study Bacteria and Microbes
Some of the reasons we study bacteria and microbes include:
- Food production and safety: Microbes are involved in food fermentation and preservation. Understanding their role helps in improving food production processes and ensuring food safety.
- Microbes can be both beneficial and harmful to human health. Studying them helps in developing treatments for infectious diseases and understanding the role of the microbiome in overall well-being.

- Many diseases are caused by or associated with microorganisms. Researching microbial life is essential for developing strategies to prevent, treat, and control infectious diseases.
- Microbes are used in various biotechnological processes, such as producing antibiotics, enzymes, and biofuels.
- Microorganisms are key in nutrient cycling, soil fertility, and waste decomposition. Understanding their functions is vital for assessing and managing environmental impact.
- Microbes are essential for maintaining ecological balance. They influence the growth of plants, the cycling of nutrients, and overall ecosystem health.
What is Agar?
Agar is a polysaccharide (puh-awl-ee-sac-uh-ride) , which is a long, fancy way to say a big sugar molecule . This sugar is obtained from algae, and humans often use it as a thickening agent in many soups, preserves, and desserts.
When dealing with microbial life in any sort of laboratory setting, scientists have to provide microbes with plenty of nutrients and space to safely grow, without risk of contamination or infection.

Agar in powder form
Many microbes are grown in nutritional broths inside test tubes, but broths can be hard to store for long periods of time. Also, they don’t allow scientists to observe the colony characteristics of bacteria, which can be really important for diagnosis and research.
To combat the issues of broth cultures, scientists will add uncultured broth and agar to either a tube or a plate, with the agar acting as a thickening agent for the broth. Tubes are best for long-term storage and allow for greater specimen storage space. However, plates are best for observation and testing.

Slant cultures of Tricophyton mentagrophytes growing on Sabourard’s agar. Photo credit: Shutterstock
There are many different kinds of agar plates. Some can be selective for or against specific bacterial traits; others may help scientists differentiate between different kinds of bacteria based on their chemical characteristics. However, some agar plates may just be enriched, meaning they don’t select or differentiate, they just provide nutrients for microbes to grow. When we are growing bacteria in agar in this experiment, we will be using LB-enriched agar plates.

Experimental Purpose of Growing Bacteria in Agar
As stated previously, there are microscopic organisms right underneath our noses. They’re also in our noses, under our fingernails, and if you have ever heard the term gut flora , that is not referring to plants that grow in your belly. Rather, it refers to the billions of microbes that have lived and developed in our intestines.
However, microbes are not found only in or on our bodies, they are found everywhere , even in places that no other organisms can even dream of living. There are entire classifications of organisms called extremophiles that live and thrive in extreme environments. For example, the organisms that live in hot springs and deep-sea hydrothermal vents are known as thermophiles . Check our resource section below for more information about extremophiles.

Thermal pools at Norris Geyser Basin, Yellowstone National Park.
In this experiment we will be growing bacteria in agar as we explore how common and numerous microbes are in our daily lives by swabbing everyday places. To do this, we will be using pre-poured agar plates, sterile cotton swabs, and our creativity to think of the oddest places where nothing except microbes could ever live in our environment.
Did you know? Scientists have isolated many of the enzymes that extremophiles, particularly thermophiles, use to survive harsh conditions. One of the most important enzymes for life is DNA polymerase, which is an enzyme that synthesizes new DNA strands off of template strands. Scientists can use the DNA polymerase from thermophiles to synthesize entirely new and isolated DNA strands from just one sample. This technique is called Polymerase Chain Reactions (PCR) and is foundational to ancestry testing, molecular forensics, and the diagnosis of genetic diseases.
What Will You Swab – Growing Bacteria in Agar
Before getting started with growing bacteria in agar, think about what you are going to swab.
In addition to testing different surfaces (ie, kitchen counter, cell phone, steering wheel, toilet handle, etc.), think about how you can test a surface before spraying it with disinfectant and after spraying it with disinfectant. When we tested disinfectant, we swabbed 1/2 of the agar with disinfectant. Once the top is back on the petri dish, draw a line down the middle and use the marker to indicate which side has disinfectant and which does not.
Additional ideas for growing bacteria in agar:
- •Swabbing a hand before washing with soap and then after.
- •Swabbing a scalp. Wipe one-half of the agar with disinfectant and leave the other side untreated. Then, take two swabs of a scalp. Transfer one swabbing to one half of the dish and a second swab to the other half of the petri dish.
- •Swab your gum line in your mouth and place it on one half of the petri dish. Then, use a mouthwash like Listerine, take a second swab, and transfer it to the other side of the petri dish. Don’t forget to label which side is which! We swabbed one half of our agar plate with the mouth antiseptic first. Then, took two swabs – one for the non-antiseptic side of the plate and a second swab for the antiseptic side of the plate.
- •Discuss dependent variables, independent variables, and control variables with your students. It will be important to keep all of the petri dishes in the same area where they receive the same temperature and light. For example, you don’t want some of the dishes in front of a sunny window and others sitting behind a nearby curtain. You want to keep all of the Petri dishes in the same area where the temperature is the same.
- •If you’re testing dirty hands vs. hands that were washed with soap before swabbing, your independent variable is whether soap is used or not. If you opt to swab inside your mouth, then if you compare swabbing before using a mouth antiseptic, like Listerine®, using antiseptic vs. not is the independent variable. What independent variables will you test?
- •The dependent variable is the bacterial growth observed in the agar petri dishes.
Procedure for Growing Bacteria in Agar

Growing Bacteria in Agar
- 1 Agar testing kit
- 1 kit Agar testing kit
- 1 piece permanent marker
- 1 copy lesson printout
- 1 pair safety glasses
- 1 pair disposable gloves
Instructions
- Determine where you will place the petri dishes while you wait for the colonies to grow. Try to place in a warm area between 78 degrees Fahrenheit and 100 degrees Fahrenheit. A warm room or incubator works well.
- Identify what you want to sample.
- Fill out the lab worksheets to label what is being tested.
- Wash hands, put on gloves, and put on eye protection.
- You will use one swab per surface swabbed.
- Run the swab over the first item or area you want to swab. Twirl the swab as you wipe to get material all over the cotton tip.
- Remove the lid from one agar plate.
- Gently roll the swab over the agar material. Do not press down too hard. Just run the swab over the agar.

- Dispose of the swab.

- Fill out the activity worksheets in the lesson printable.
- Place the petri dishes in a warm place. All of the dishes should receive the same temperature and light. The ideal temperature is between 78- and 100-degrees Fahrenheit. Do not open the dishes!

- Once the activity is complete, wear gloves and eye protection and dispose of the dishes properly. Do not open the lids. Toss all gloves and disinfect the area where the dishes were sitting.
Photo Results – Growing Bacteria in Agar

What did you learn from growing bacteria in agar? What was surprising? What swab grew the most bacteria?
In our set of swabs, the cell phone swab was the clear winner for the biggest colony of bacteria. We thought the steering wheel would have more bacteria. We tested soap vs. no soap on hands and disinfectant vs. no disinfectant too. As expected, the swabs with soap and disinfectant had fewer bacteria than the non-soap and non-disinfectant swabs.
Complete the results and observations sections in the printable.
Get the Growing Bacteria in Agar Microbiology Lesson Printable & Extra High School Reading
Input your email address, and we’ll send you the printable asap! You will be added to our email community.
Other Resources
Read more about extremophiles from the American Society for Microbiology .
An excellent PDF document on extremophiles from Scientific American .
Make a Mold Terrarium
High School Level Extra Information
We have put together a 5-page read for high school and above. This reading lesson contains more information about bacteria, disinfectants, and antibiotics. We will soon add this information as a blog post.
I hold a master’s degree in child development and early education and am working on a post-baccalaureate in biology. I spent 15 years working for a biotechnology company developing IT systems in DNA testing laboratories across the US. I taught K4 in a private school, homeschooled my children, and have taught on the mission field in southern Asia. For 4 years, I served on our state’s FIRST Lego League tournament Board and served as the Judging Director. I own thehomeschoolscientist and also write a regular science column for Homeschooling Today Magazine. You’ll also find my writings on the CTCMath blog. Through this site, I have authored over 50 math and science resources.
- Earth Science
- Physics & Engineering
- Science Kits
- Microscopes
- Science Curriculum and Kits
- About Home Science Tools
Science Projects > Chemistry Projects > How To Grow Bacteria and More
How To Grow Bacteria and More
If learning how to grow bacteria in a petri dish interests you, read on.
How Can Bacteria Help Us? How Can Bacteria Harm Us? What Are Antibacterial Agents? Experiment #1: Cheek Cell Swab Experiment #2: Testing Antibacterial Agents Experiment #3: Soap Survey Experiment #4: Bacteria in the Air Experiment #5: Homemade Yogurt More Experiment Ideas
Bacteria Overview
Bacteria are one-celled, or unicellular, microorganisms . They are different from plant and animal cells because they don’t have a distinct, membrane-enclosed nucleus containing genetic material. Instead, their DNA floats in a tangle inside the cell.
Individual bacteria can only be seen with a microscope, but they reproduce so rapidly that they often form colonies that we can see. Bacteria reproduce when one cell splits into two cells through a process called binary fission. Fission occurs rapidly in as little as 20 minutes. Under perfect conditions a single bacterium could grow into over one billion bacteria in only 10 hours! (It’s a good thing natural conditions are rarely perfect, or the earth would be buried in bacteria!)
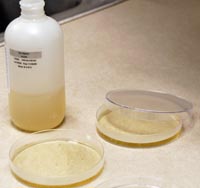
Growing and testing bacteria is a fun any-time project or a great science fair project. Bacteria are everywhere, and since they reproduce rapidly they are easy to study with just a few simple materials. All you need are some petri dishes , agar, and sterile swabs or an inoculating needle . Agar is a gelatinous medium that provides nutrients and a stable, controlled environment for bacteria growth . Most bacteria will grow well using nutrient agar , but some more fastidious bacteria (those with more complex nutrient requirements like Bacillus stearothermophilus , Branhamella catarrhalis , and Bacillus coagulans ) prefer tryptic soy agar .
You also need a source for bacteria, and this is not hard to find! You can swab your mouth or skin, pets, soil, or household surfaces like the kitchen sink or toilet bowl. If you want to study a particular type of bacteria, you can also purchase live cultures . Keep reading to see four experiments using bacteria, and many more ideas for science projects (also consider this hands-on Bacteria Growing Kit )! Adult supervision is recommended when working with bacteria.
How Can Bacteria Help Us?
Where would we be without bacteria? Well, we might not be getting bacterial diseases, but we would still be a lot worse off! Bacteria perform all sorts of very important functions, both in our bodies and in the world around us. Here are just a few.
Digestion. Our large intestines are full of beneficial bacteria that break down food that our bodies can’t digest on their own. Once the bacteria break it down, our intestines are able to absorb it, giving us more nutrients from our food.
Vitamins. Bacteria in our intestines actually produce and secrete vitamins that are important for our health! For example, E. coli bacteria in our intestines are a major source of vitamin K. (Most E. coli is good for us, but there is a harmful type that causes food poisoning.)
Food. Bacteria are used to turn milk into yogurt, cheese, and other dairy products.
Oxygen. Cyanobacteria (which used to be called blue-green algae) live in water and perform photosynthesis, which results in the production of much of the oxygen we need to breathe.
Cleanup. Oil spills, sewage, industrial waste — bacteria can help us clean all of these up! They ‘eat’ the oil or toxins and convert them into less harmful substances.
Bacteria are amazing creatures, aren’t they? They can be so dangerous and yet so important at the same time. Keep reading to see an experiment that uses good bacteria!
How Can Bacteria Harm Us?
Some types of bacteria cause disease and sickness. These kinds of bacteria are called pathogens. They reproduce very rapidly, like all bacteria. These come in many forms and can cause illnesses from an ear infection to strep throat to cholera. They can get into our bodies via our mouth and nose, or through cuts and scrapes. Some are airborne, others are found in food, resulting in food poisoning. Bacteria are also the cause of plaque buildup on our teeth, which can lead to cavities and gum disease.
Before the discovery of antibiotics, many severe bacterial diseases had no cure and usually resulted in death. Antibiotics work by destroying bacteria or inhibiting their reproduction while leaving the body’s own cells unharmed. After a time, some bacteria develop resistance to an antibiotic, and it will no longer be effective against them. Because of this, scientists are always researching new antibiotics. (Many diseases, such as chicken pox, hepatitis, or polio, are caused by viruses rather than bacteria. Antibiotics have no effect against these diseases.)
Bacterial infections are common, but many of them can be avoided by good cooking, cleaning, and hand-washing practices.
What Are Antibacterial Agents?
How do people stop bacteria from growing and spreading? They control it in two ways: by killing the bacteria cells, and by stopping the bacteria from reproducing. An agent is a solution or method which either kills or stops reproduction. Bactericides are agents that kill bacteria cells. Static agents inhibit cell growth and reproduction.
There are a variety of ways to kill bacteria or keep it from reproducing.
Physical methods:
- Sterilization. The application of heat to kill bacteria. Includes incineration (burning), boiling, and cooking.
- Pasteurization. The use of mild heat to reduce the number of bacteria in a food.
- Cold temperatures. Refrigeration and freezing are two of the most common methods used in homes, for preserving food’s life span.
Chemical methods:
- Antiseptics. These agents can be applied directly to living tissues, including human skin.
- Disinfectants. These agents are not safe for live tissues. Disinfectants are used to clean toilets, sinks, floors, etc.
- Some food preservatives are: sodium benzoate, monosodium glutamate (MSG), sulfur dioxide, salts, sugar, and wood smoke.
- Amoxycillin and Ampicillin—inhibit steps in cell wall synthesis (building)
- Penicillin—inhibits steps in cell wall synthesis
- Erythromycin—inhibits RNA translation for protein synthesis
SAFETY NOTE
While most environmental bacteria are not harmful to healthy individuals, once concentrated in colonies, they can be hazardous.
To minimize risk, wear disposable gloves while handling bacteria, and thoroughly wash your hands before and after. Never eat or drink during bacteria studies, nor inhale or ingest growing cultures. Work in a draft-free room and reduce airflow as much as possible. Keep petri dishes with cultured mediums closed—preferably taped shut—unless sampling or disinfecting. Even then, remove the petri dish only enough to insert your implement or cover medium with bleach or 70% isopropyl alcohol.
When finished experimenting, seal dishes in a plastic bag and dispose. Cover accidental breaks or spills with bleach or alcohol for 10 minutes, then carefully sweep up, seal in a plastic bag, and discard.
Preparing Culture Dishes
Before you can grow bacteria, you’ll need to prepare sterile culture dishes. A 125ml bottle of nutrient agar contains enough to fill about 10 petri dishes.
Water Bath Method – Loosen the agar bottle cap, but do not remove it completely. Place the bottle in hot water at 170-190 °F until all of the agar is liquid. To prevent the bottle from tipping, keep the water level even with the agar level.
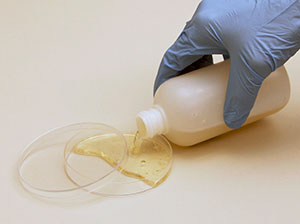
- Let the agar cool to 110-120 °F (when the bottle still feels warm but not too hot to touch) before pouring into petri dishes.
- Slide open the cover of the petri dish just enough to pour agar into the dish. Pour enough agar to cover 1/2 to 2/3 of the bottom of the dish (about 10-13ml). Don’t let the bottle mouth touch the dish. Cover the dish immediately to prevent contamination and tilt it back and forth gently until the agar coats the entire bottom of the dish. (Fill as many dishes as you have agar for: you can store extras upside down until you’re ready to use them.)
- Let the petri dishes stand one hour for the agar to solidify before using them.
Experiment #1: Cheek Cell Swab
Make a culture dish using the instructions above. Once the culture dish is prepared, use a sterile cotton swab or inoculating needle and swab the inside of your cheek. Very gently rub the swab over the agar in a few zigzag strokes and replace the lid on the dish. You’ll need to let the dish sit in a warm area for 3-7 days before bacteria growth appears. Record the growth each day with a drawing and a written description. The individual bacteria are too tiny to see without a high-power microscope, but you can see bacteria colonies. Distinguish between different types of bacteria by the color and shape of the colonies.
Experiment #2: Testing Antibacterial Agents
Preparing Sensitivity Squares
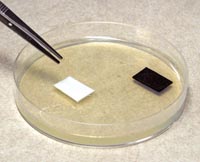
One method for testing the antibacterial effectiveness of a substance is to use ‘sensitivity squares.’ Cut small squares of blotter paper (or other absorbent paper) and then soak them in whatever substance you want to test: iodine, ethyl alcohol, antibacterial soap, antiseptics, garlic, etc. Use clean tweezers to handle the squares so you don’t contaminate them. Label them with permanent ink, soak them in the chosen substance, and blot the excess liquid with a paper towel.
Collecting Bacteria
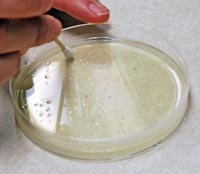
Decide on a source for collecting bacteria. For using sensitivity squares, make sure there is just one source, and keep each dish as consistent as possible. Sources could include a kitchen sink, bathroom counter, cell phone, or another surface you would like to test. Rub a sterile swab across the chosen surface, and then lightly rub it across the prepared agar dish in a zigzag pattern. Rotate the dish and repeat.
Setting Up an Experiment

Each experiment should have a control dish that shows bacteria growth under normal conditions and one or more test dishes in which you change certain variables and examine the results. Examples of variables to test are temperature or the presence of antiseptics. How do these affect bacteria growth?
- Label one dish ‘Control.’ Then in your test dish, use tweezers to add the sensitivity squares that have been soaked in a substance you wish to test for antibacterial properties. It’s a good idea to add a plain square of blotter paper to see if the paper by itself has any effect on bacteria growth. For best results, use multiple test dishes and control the variables so the conditions are identical for each dish: bacteria collected from the same place, exposed to the same amount of antibacterial substance, stored at the same temperature, etc. The more tests you perform, the more data you will collect, and the more confident you can be about your conclusions.
- Place all the dishes in a dark, room-temperature place like a closet.
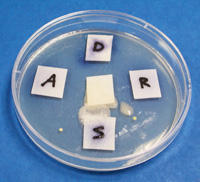
Wait 3-7 days and examine the bacteria growth in the dishes, without removing the lids. You will see multiple round dots of growth; these are bacteria colonies. Depending on where you collected your bacteria samples, you may have several types of bacteria (and even some mold!) growing in your dishes. Different types of colonies will have different colors and textures. If you have a compound or stereo microscope, try looking at the colonies up close to see more of the differences.
Compare the amount of bacteria in the control dish to the amount in the test dishes. Next, compare the amount of bacteria growth around each paper square. Which one has bacteria growing closest to it? Which one has the least amount of bacteria growing near it? If you did more than one test dish, are the results similar in all the test dishes? If not, what variables do you think might have caused the results to be different? How does this affect your conclusions?
For a variation on this experiment, test the effect of temperature on bacterial growth instead of using sensitivity squares. Put a control dish at room temperature, and place other dishes in dark areas with different temperatures.
Experiment #3: Soap Survey
Every time you touch something you are probably picking up new bacteria and leaving some behind. This is how many infectious diseases spread — we share our bacteria with everyone around us! Even bacteria that lives safely on our skin can make us sick if it gets inside our bodies through our mouths or cuts and scrapes. This is one reason why it is so important that we wash our hands frequently and well.
What kind of soap works best for cutting down on the bacteria on our hands? You can test this by growing some bacteria cultures using agar and petri dishes.
- Two (or more) petri dishes
- Sterile swabs
- Blotter paper or other absorbent paper
- Forceps or tweezers
- Different kinds of hand cleaners: regular soap, antibacterial soap, dish soap, hand sanitizer
1. Prepare the agar according to the directions on the label, then pour enough to cover the bottom of each petri dish. Cover the dishes and let them stand for about an hour until the agar has solidified again. (If you aren’t going to use them right away after they have cooled, store them upside down in the refrigerator.)
2. When your petri dishes are ready, collect some bacteria from your hand or the hand of a volunteer. (Make sure the person hasn’t washed his or her hands too recently!) Do this by rubbing the sterile swab over the palm in a zigzag pattern.
3. Remove the cover from the petri dish and lightly rub the swab back and forth in a zigzag pattern on the agar. Turn the dish a quarter turn and zigzag again. Cover the dish and repeat steps two and three for the other dish, using a new sterile swab. Label the dishes “Test” and “Control.” (You may want to do more than one test dish, so you can compare the results.)
4. Cut the blotter paper into small “sensitivity squares.” Use permanent ink to label the squares for the different types of hand cleaners you are going to test, e.g., “R” for regular soap, “A” for antibacterial soap, and “S” for hand sanitizer. Using tweezers, dip each square into the appropriate cleaner. Blot the excess cleaner on a paper towel and then place the squares on the agar in the “Test” dish. (Spread the squares out so there is distance between them.) Add one square of plain blotter paper to test if blotter paper by itself has any effect. Don’t put any squares in the “Control” dish – this one will show you what the bacterial growth will look like without any soap.
5. Put the dishes in a dark, room-temperature place like a closet and leave them undisturbed for a few days.
What Happened
The rate of bacteria growth in your dishes will depend on temperature and other factors. Check your cultures after a couple of days, but you’ll probably want to wait 5-7 days before recording your data. You will see multiple round dots of growth; these are bacteria colonies. There may be several types of bacteria growing in the dishes. Different types of colonies will have different colors and textures.
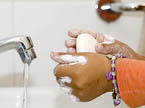
For each soap test, count and record the number of bacteria colonies in each dish. To see how effective each soap was, divide the number of colonies in the test dish by the number of colonies in the control dish, then subtract the result from 1 and write the answer as a percentage. For example, if your control dish had 100 colonies and your soap test dish had 30, the soap eliminated 70% of the bacteria: 1 — (30 ÷ 100) = .7 = 70%
According to your results, which type of soap was the most effective at eliminating bacteria? Does “antibacterial” soap really work better than regular soap? How well did washing hands in water without soap work? What further tests could you do to determine which soaps and hand washing methods are most effective at eliminating bacteria?
Experiment #4: Bacteria in the Air
You need two culture dishes for this experiment, in which you’ll demonstrate how antibacterial agents (such as antibiotics and household cleaners) affect bacteria growth.
Leave the dishes with their lids off in a room-temperature location. Leave the culture dishes exposed for about an hour.
While you wait, cut small squares of paper (blotter paper works well), label them with the names of the antibacterials you’re going to test (e.g. ‘L’ for Lysol, ‘A’ for alcohol, etc.), and soak each in a different household chemical that you wish to test for antibacterial properties. If you have time, you might also experiment with natural antibacterial agents, such as tea tree oil or red pepper. Wipe off any excess liquid and use tweezers to set each of the squares on a different spot in one of the culture dishes. The second culture dish is your ‘control.’ It will show you what an air bacteria culture looks like without any chemical agents.
Store the dishes (with lids on) in a dark place like a closet where they will be undisturbed for a few days. After 3-7 days, take both culture dishes and carefully observe the bacteria growth in each dish, leaving the lids on. The bacteria will be visible in small, colored clusters. Take notes of your observations and make drawings. You could also answer the following questions. In the control culture, How much of the dish is covered with bacteria? In the sensitivity square test culture, Have the bacteria covered this dish to the same extent as the control culture? What effect have each of the chemicals had on the bacteria growth? Did a particular chemical kill the bacteria or just inhibit its growth?
- For further study you could use an antibiotic disc set to see what different antibiotics can do against bacteria.
- For a more advanced project , learn how gram staining relates to the use of antibiotics.
Experiment #5: Homemade Yogurt
Generally when people think of ‘bacteria,’ they think of harmful germs. However, not all forms of bacteria are bad! You can enjoy a tasty product of good bacteria by making a batch of yogurt at home.
You’ll need to use a starter (available at grocery or health food stores), or else one cup of plain, unflavored yogurt that has live cultures in it. (If it contains live cultures, it will say so on the container.)
Slowly heat four cups of milk until it is hot, but not boiling or scalding. The temperature should be around 95-120 degrees to kill some of the harmful bacteria. Cool slightly, until milk is warm, and then add one cup of active yogurt or the starter.
Put the mixture in a large bowl (or glass jars) and cover. Make sure that the bowl or jars are sterilized before using by either running them through the dishwasher or washing them with very hot water.
There are two different methods for culturing the yogurt mixture: You can put the covered bowl or jars into a clean plastic cooler, and fill the cooler with hot water to just below the top of the culture containers. With this method, you will need to occasionally refill the cooler with hot water, so that the temperature of the yogurt stays consistent. The other method is to wrap the containers in a heating pad and towels, setting the heating pad on low to medium heat.
Check the mixture after heating for 3 1/2 to 4 hours. It should be ‘set up,’ having a smooth, creamy consistency similar to store-bought yogurt. If the mixture is not set up yet, heat it for another 1-2 hours. When it is the right consistency, add some flavoring—such as vanilla extract, chocolate syrup, or berries—and store the yogurt in the refrigerator. It should keep for a couple of weeks. For safety, we suggest that you do not eat any yogurt that has separated or has a non-typical consistency.
More Bacteria Experiment Ideas
Here are some other project ideas for you to try on your own or use as a basis for a bacteria science fair project:
- Mouthwash . Swab your teeth and gums and see how well toothpaste or mouthwash work against the plaque-causing bacteria on your teeth.
- Dog’s mouth : Have you heard people say that dogs’ mouths are cleaner than humans’? Design an experiment to test whether this is really true!
- Band-aid . Some band-aids are advertised as being antibacterial. Test to see if they really work better than regular band-aids at inhibiting bacteria.
- Water bottle . Is it safe to keep refilling a water bottle without washing it? Test a sample of water from the bottom of a water bottle that has been used for a couple days and compare it to a sample from a freshly-opened, clean water bottle. You can also test to see if a bottle gets more bacteria in it if you drink with your mouth or with a straw.
- Shoes . Do bacteria grow in your shoes? Is there a difference in bacteria growth between fabric shoes and leather? Do foot powders work to cut down on bacteria?
- Toothbrush . Do bacteria grow on your toothbrush? What are some ways you could try to keep it clean? Mouthwash? Hot water?
- Makeup . Some people recommend getting new mascara every six weeks because bacteria can grow in the tube. Test this by comparing bacteria growth from old mascara and new, unused mascara. You can also test how much bacteria is on other kinds of makeup.
Teaching Homeschool
Welcome! After you finish this article, we invite you to read other articles to assist you in teaching science at home on the Resource Center, which consists of hundreds of free science articles!
Shop for Science Supplies!
Home Science Tools offers a wide variety of science products and kits. Find affordable beakers, dissection supplies, chemicals, microscopes, and everything else you need to teach science for all ages!
Related Articles
Kids First Early Engineering Kits
A Perfect Blend of Fun and Learning In today’s digital world, finding the right balance between screen time and hands-on learning for kids can be a challenge. That’s why educational toys like Kids First Early Engineering Kits have become a popular choice among...
Gift for Biologists
Looking for ideas for gifts that will thrill even the most hard-to-shop-for biologists on your list, whether young or old? (Kids or having a PhD?) We have just the list for you! Read on for favorites (or find top gifts for science lovers of any kind). Biology is...

Cool Gifts for Science Lovers
Looking for the perfect gift for a kid (or adult!) on your list who loves to fiddle with, build, or learn about things? Read on for some cool gifts for any science lovers...whether they actually realize it’s science or not! Browse our best gifts for...


Meet Our HST Alumni
Celebrating Exceptional Learning For 30 years, we've shared our mission to inspire learning through hands-on science with over 1.7 million homeschoolers. Thank you for letting us be your partner in education that goes beyond textbooks or classrooms. Meet three members...
Easy STEM Activities with Paper
Easy STEM Activities with Paper Beneficial STEM activities don't always require expensive materials or fancy equipment–a tool as simple as paper can teach children a range of STEM concepts. In this article, we'll explore STEM activities using paper, from paper...
JOIN OUR COMMUNITY
Get project ideas and special offers delivered to your inbox.

How to Make Agar Plates for Growing Bacteria
- Gino Biotech
- October 15, 2024
If you’ve ever wondered how to make agar plates for growing bacteria at home, you're in the right place. Whether you're a science enthusiast, a student, or working in a small lab, creating agar plates at home or in the lab is easier than you might think.
With just a few simple materials and steps, you can create a medium that allows bacteria to thrive, helping you carry out experiments, observe microbial growth, or even conduct scientific research.
In this guide, I’ll walk you through the entire process, ensuring you feel confident from start to finish. Let's dive in and discover how to make agar plates for growing bacteria!
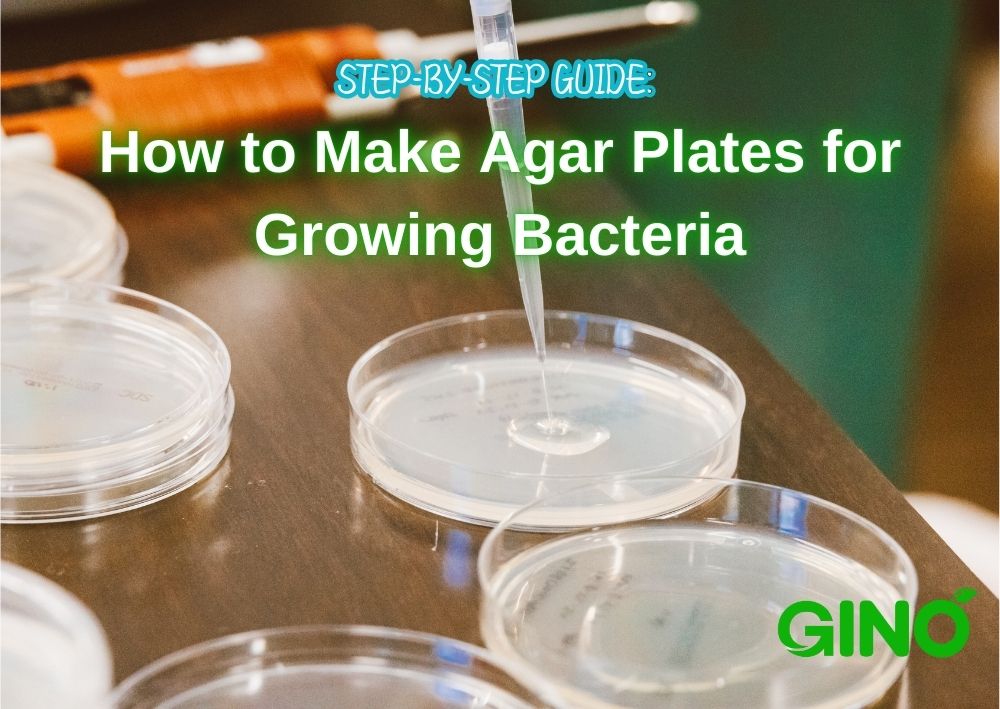
What You’ll Need to Make Agar Plates
Before we start the process, gather the following materials:
- Agar powder - Making agar plates from powder. This is the base of your agar plate, typically made from seaweed. You can find it in specialty food stores or online.
- Nutrient broth or agar - For bacteria to grow, you’ll need to add nutrients that help them thrive.
- Distilled water - Purified water is essential to prevent contamination.
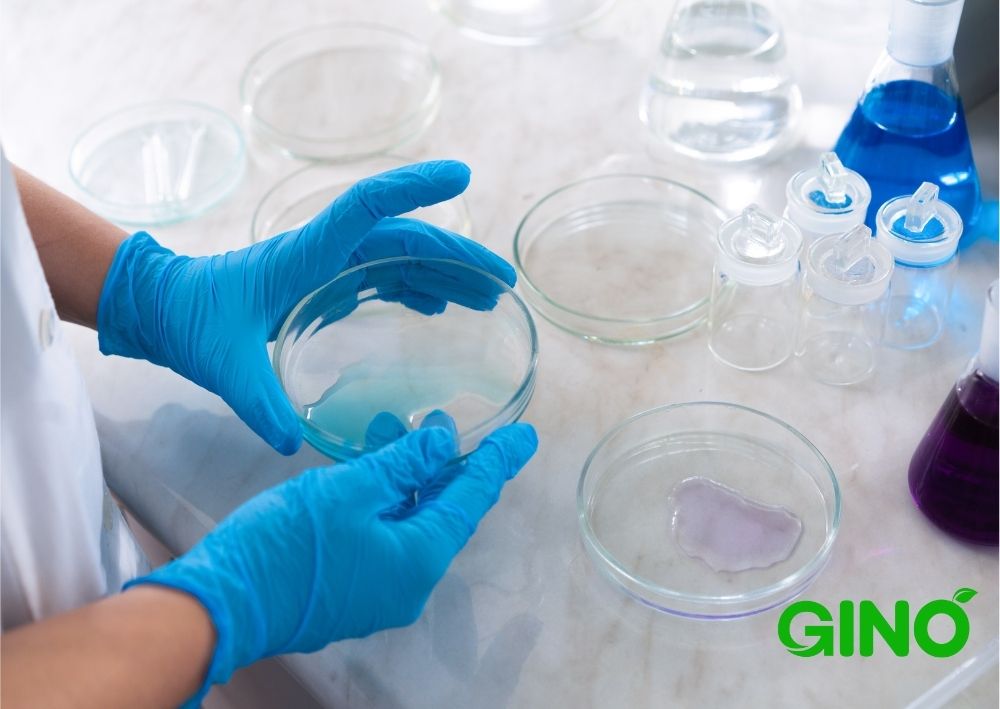
- Sterile Petri dishes - These will hold your agar mixture.
- Autoclave or pressure cooker - Necessary for sterilizing the medium and equipment.
- Measuring cup and spoon - To measure the correct amount of ingredients.
- Heat source (stovetop or microwave) - For boiling the agar mixture.
- Sterile inoculation tools - Such as a loop or swab for spreading bacteria.
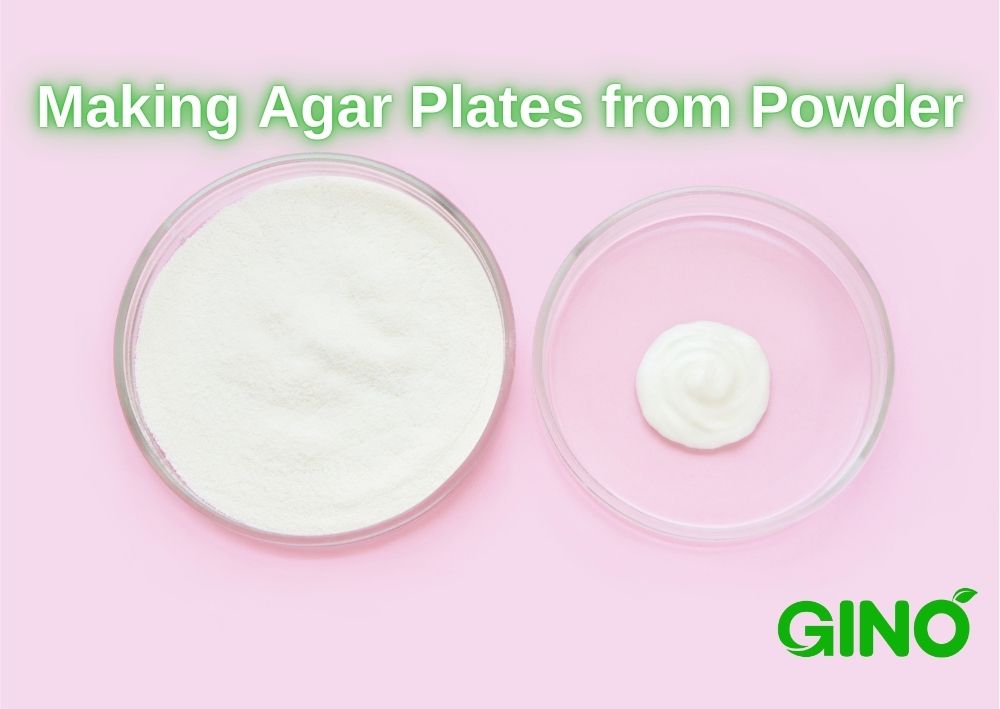
Step-by-Step: How to Make Agar Plates for Growing Bacteria
1. prepare the agar mixture.
In a clean workspace, mix your agar powder with nutrient broth and distilled water. The standard ratio is about 20 grams of agar to 1 liter of water.
Adjust depending on how many plates you need.
Stir the mixture thoroughly to ensure the agar dissolves.
2. Heat the Mixture
Once your ingredients are combined, heat the solution.
If you’re using a stovetop, bring the mixture to a boil while stirring continuously. Alternatively, use a microwave in short intervals, ensuring the agar dissolves completely.
This step is crucial to make the agar ready to solidify properly in the plates.
3. Sterilize the Agar
To prevent contamination, sterilize the agar by placing it in an autoclave or a pressure cooker at 121°C (250°F) for 15-20 minutes.
This step kills any unwanted microorganisms that might interfere with your bacterial growth.
Be cautious when handling hot materials, and allow the pressure to drop before opening the container.
4. Cool the Agar to Pouring Temperature
Once sterilized, let the agar mixture cool slightly to around 45-50°C.
Cooling it too much will cause it to solidify in your container, but pouring it too hot can damage the Petri dishes or cause uneven solidification.
5. Pour the Agar into Petri Dishes
In a sterile environment, carefully pour the agar into sterile Petri dishes, covering just the bottom (about 3-5mm thick). Ensure the surface is smooth and bubble-free.
Work quickly but carefully, and avoid opening the Petri dishes for too long to reduce contamination risks.
6. Allow the Agar to Solidify
Let the plates sit at room temperature for about 30 minutes or until the agar has fully solidified.
If you are not using the plates immediately, store them upside down in the refrigerator to prevent condensation from dripping onto the agar surface.
7. Inoculate the Plates with Bacteria
Once the agar has solidified, you can inoculate the plates by introducing bacteria. Use a sterile inoculation loop or swab to spread the bacteria evenly across the plate.
Depending on your experiment, you may want to streak bacteria to isolate individual colonies or apply a uniform layer for growth.
8. Incubate the Agar Plates
Place the inoculated agar plates upside down in an incubator or a warm area, typically between 30-37°C for most bacteria.
This upside-down position prevents condensation from falling onto the growing colonies, which could affect results.
Check the plates after 24-48 hours for signs of bacterial growth.

Common Issues and Troubleshooting Tips
- Condensation on plates : Storing plates upside down helps minimize condensation, which can interfere with bacterial growth.
- Contamination : If you notice unexpected growth (like mold), your workspace or materials may not have been properly sterilized. Always ensure you’re working in a clean environment and follow proper sterilization protocols.
- Agar not solidifying : This usually happens if the agar concentration is too low or the mixture was not boiled long enough. Ensure you’re using the correct ratios and boiling thoroughly.
Now that you know how to make agar plates for growing bacteria, you’re ready to embark on your own scientific experiments, whether at home or in a lab.
With the right materials and careful preparation, you can create a perfect environment for bacterial cultures to grow, observe, and analyze.
It's a rewarding process that brings science into your hands, and following these steps will help ensure success in your microbial growth endeavors.
If you’re looking for high-quality agar to make your own plates, we can help!
Our company specializes in providing various types of agar, suitable for scientific, laboratory, and even home experiments.
Reach out to us today to explore our wide range of hydrocolloids, including agar that meets your needs.

7 Key Benefits of Agar in Microbiology

4 Top Guides on How to Use Agar Agar

How to Make Agar Agar Powder-The 3 Common Extraction Methods
Recent Posts

Can Carrageenan Cause Cancer? The Answer is No!
Nutrient Agar vs Agar: Key Differences, Uses, and Why It Matters
Agarose in Electrophoresis: Everything You Need to Know

Types of Agars: A Complete Guide to Choosing the Right One for Your Needs

Easy Vegan Jello Recipe: Delicious and Gelatin-Free!
Unlocking the Secrets of Agar: What Is Agar and Why Is It Used in Microbiology?

We are a biotech company specializing in the research, development, and commercialization of innovative and technological food additives hydrocolloids Agar Agar , Carrageenan , and Tailor-Made Stabilizer Solutions .
With the extended know-how and experience in the research, application, and use of Hydrocolloids, we could provide one-stop-shop customized solutions perfectly matched to the needs of our customers.
Our products cover the needs of the Meat, Dairy, Bakery, Confectionery, and other industrial sectors.
Contact our sales representative for more information .

Need help? Call our sales and support team 24/7 at (86) 187-0360-6965

For over 10 years, Gino Biotech has been a major supplier of food hydrocolloids. With our variety of plant-based gums & stabilizers, we can create tailor-made hydrocolloid solutions perfectly matched to the needs of our customers. READ MORE
Featured Products
- Agar Agar Series
- Carrageenan Series
- Customized Solutions
- Instant Series
- Agarose Series
Quick Links

- Carrageenan
Explore The Good Life With Wonderful Hydrocolloids
These documents were created by experts who have been engaged in the hydrocolloids industry for more than 8 years.
These documents contain the secrets of the industry.
Leave your email to get them, it's 100% free!

* 39.4 Mb, The download link will be sent to your email.
* Your email information is absolutely safe, we will not disclose it to third parties for any reason.
Get The Exclusive
News, resources, more about what you'll get from our newsletter.
- Technical papers, articles and videos on food texture and stability;
- The newest food trends, consumer demands and texture innovation;
- The right food gums & stabilizers system that solves your challenge;
- A team that can handle the complexity and help you formulate products;
- Supplier selection criteria and methods and other purchasing skills.
Subscribe to Find the Secret to Connecting a Better Healthier Life!
Privacy Policy
Contact Form

A Shocking Bacteria Science Experiment: Grow a Germ Farm
This post may contain affiliate links.
Sharing is caring!
I used to think that my house was clean . It certainly appears clean and tidy. There are no piles of trash or sticky countertops. Who knew there was so much bacteria lurking? I’m so glad we did this bacteria science experiment!
We recently studied bacteria in our science program , N OEO Biology 2 , by reading a bit of The Complete Book of the Microscope . I love the Usborne science books because they include suggested experiments. The book suggested taking a bacteria culture from hands, but we decided to take this bacteria science experiment a little further and culture other surfaces around our home as well to create our own little germ farm.
The results were quite shocking.
Bacteria Science Experiment
How to grow your own germ farm.
Growing bacteria cultures requires a few things:
- Agar plates
- Sterile cotton swabs
- Bottled water
- A heat source

- BIOTECH QUALITY, FRESH AND READY-TO-USE: Factory-direct fresh 10 100-mm Pre-poured sterile LB-agar plates and 10 sterile 6-inch long swabs (in 5 pouches)….
- The Safest Agar Plates On Amazon: Luria Broth(LB) agar plates are used to detect environmental microorganisms all over the world. They are the safest agar…
- Free Science Fair Project E-Book: Packed with easy-to-do science fair experiments with clear step-by-step instructions to help you win a science fair…
Last update on 2024-12-24 / Affiliate links / Images from Amazon Product Advertising API
- Label the cover of the agar plates with the surface you intend to swab.
- Unwrap a sterile cotton swab and pour on a little bottled water.
- Swab the surface you want to test.
- Rub the cotton swab on the agar plate.
- Place the labeled lid on top and tape it shut.
- Turn the sealed agar plate upside down so that the name is on the bottom. This lets you observe the bacteria’s growth without the label being in the way.
- Repeat as many times as you would like, using a new agar plate and a clean cotton swab with each surface.
- Place the bacteria cultures in a warm place. Ideally, the temperature should be kept between 85 and 100 degrees. We placed our tray of cultures in front of a space heater in the guest room. The room stayed pretty toasty with the door shut. I always turned the space heater off when we went to bed, for safety reasons, but the bacteria grew even with the cooler overnight temperature.
We chose surfaces that we thought might harbor bacteria, even though they looked clean.
- Dirty hands
- Clean hands (we expected this to be bacteria-free)
- Refrigerator handle
- Door handle
- Toilet seat
- Kitchen faucet
- Light switch
We looked at our germ farm each day, but let the bacteria science experiment grow for 3 full days before recording our results.

Bacteria Science Experiment Results
After 3 full days, we observed the different cultures. I couldn’t find a way to determine exactly which bacteria, mold, and yeasts we were growing without a high-powered microscope . We were able to use our microscope that connects to our TV to notice edge lines of the cultures, but nothing really detailed. That’s okay though. There was still plenty to observe.
We noticed the shape, size, and color of all the growth. The colors ranged from a cloudy white to a creamy yellow. There were even a few spots of fuzzy green.
What surprised us was the amount of microbes growing. My house is generally clean! Who knew we were surrounded by so much bacteria?
In order from least germs to the most –
- Clean hands (!)
- Fridge handle

For the most part, the bacteria amounts were a little unsettling, but likely are not harmful. There is no way for us to know if the bacteria grown is good bacteria or bad bacteria. We are rarely sick so I’m not too worried. Just a bit grossed out . I have always heard that being too clean is worse for immune systems than living around a little dirt. I guess that must be true.
We did take this as an opportunity to review proper hand-washing techniques again though. A friend, who is a nurse, suggested singing “Happy Birthday” twice as a way to not skimp on hand washing time.
Hannah and Ben drew a few of the bacteria cultures in their science notebooks and wrote a few sentences about the experiment and what they learned.
Then we sealed the cultures up in a Ziploc bag and threw them away. They were beginning to smell a bit, which I took as a bad sign. My husband joked that one day soon the bacteria would take over the house.
All in all, this was a fascinating experiment and one that we hope to recreate again soon. I would love to test surfaces out in public. Although, I’m a little afraid to see what is lurking on a Target shopping cart handle.
As an Amazon Associate I earn from qualifying purchases.
Related Posts:

Welcome! My name is Jennifer. I am a teacher at heart. Before my children were born I was a public school teacher. Now, I am a homeschooling mom of two.
Hello! Appreciate your post! My 3rd grader is attempting this project for her science fair this weekend. We did the swabs Monday. And have kept then under a lamp for the last three days but nothing has happened …..did yours get condensation?! It’s the only thing I see. 🙁 Hope we didn’t botch her project. Thank you!
Hi! We did have some condensation. The condensation formed under the lid and the bacteria grew on the agar plate. I wonder if maybe the lamp isn’t producing enough heat for the samples. Hopefully something starts to grow soon!
I’m worried about leaving a heat source on all day when we’re at work. We’re going to attempt this for the science fair. Was thinking of an aquarium with maybe two green house lights to heat, but still worried about leaving that on. Any other suggestions or thoughts???
I checked with a scientist friend and she suggested putting the bacteria samples on top of the refrigerator.
We did this with dirty hands in the classroom. I took pictures of what grew and sent them to an expert. He first reminded me not to remove the lids under any circumstances. He then told me some of what was on there. The children in my class had nasty hands. There was staphylococcus, Ecoli, and psudamonis, Just to name a couple.
Sending a photo to an expert was a great idea! It really is shocking to see what kind of germs are all around us.
Leave a Reply
Your email address will not be published. Required fields are marked *

IMAGES
COMMENTS
(µ/ý X,íZHe;4 ¦äl [•Q³mƒ^î '« ôаÍ}=;Žf ˆx-®jK¼ØGI TRf Þ‰ œ ™ M 1ÍÃ0‹_9æ !ëš ” &>¿c¢~ [¿ ª/ üåc„,é6: –¬˜ƒÍùÛ»Ý ç{¿ošÚß4ùk Óþ[®¼¨ õ„ ÿal › - ¶Ÿ|œ`°x~ç§Z æpÊÔjïVÔïak‡Oâ© »Dˆ[•â©[™Q?ijŠj j2ø›¦ 1NQ%N‡ÿ$¶G#Ø[ \Zçg ÎIEµ ¼óú‰èG£ 1ÎшúÑÈc„ˆºÂ ýÑ:¿¢Z ...
Agar is a gelatinous medium that provides nutrients and a stable, controlled environment for bacteria growth. Most bacteria will grow well using nutrient agar, but some more fastidious bacteria (those with more complex nutrient requirements like Bacillus stearothermophilus, Branhamella catarrhalis, and Bacillus coagulans) prefer tryptic soy agar.
Oct 15, 2024 · Inoculate the Plates with Bacteria. Once the agar has solidified, you can inoculate the plates by introducing bacteria. Use a sterile inoculation loop or swab to spread the bacteria evenly across the plate. Depending on your experiment, you may want to streak bacteria to isolate individual colonies or apply a uniform layer for growth.
4 days ago · Rub the cotton swab on the agar plate. Place the labeled lid on top and tape it shut. Turn the sealed agar plate upside down so that the name is on the bottom. This lets you observe the bacteria’s growth without the label being in the way. Repeat as many times as you would like, using a new agar plate and a clean cotton swab with each surface.
Jul 26, 2017 · Grow Bacteria On Homemade Agar Plates Make your own agar Petri dishes and grow bacterial colonies. Youll be amazed at the diversity of bacteria around us all the time. Suitable for kids aged 8+ with parental supervisionCAUTIONThis science activity involves the use of boiling water. Hot water must o
multiply. In the lab, this is supplies through agar plates. Agar plates provide the requirements for these bacteria to grow. A sample is applied to the agar and left in an incubator overnight. The sample will grow and scientists can examine the bacteria present. Aim: To show that bacteria are common in our environment. This will be achieved by ...