
Apple Science Experiment: Prevent Browning
This post may contain affiliate links.

My kids love eating apples, but they really don’t love it when they turn brown. We decided to try a fun apple science experiment so they could learn what keeps apples from browning. (See 200+ more STEM projects for kids)
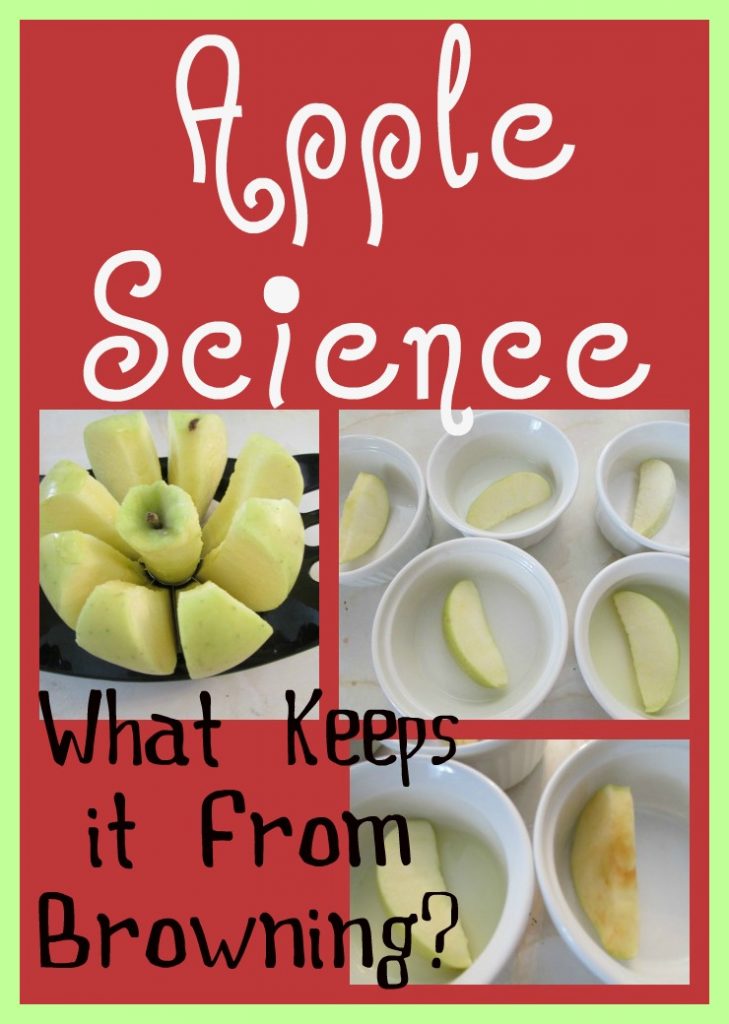
We first talked about why apple brown and discussed the comparison with rusting (oxidation). It is a chemical reaction with the oxygen and an enzyme in the apples. This helped the kids understand why it happened.
How to Do the Apple Experiment:
To do this apple science experiment, you’ll just need a few items: an apple, a knife, a few bowls, and various edible liquids.
I already knew the answer to this apple oxidation experiment, but I didn’t want to let my kids know about it. I let them choose various substances and liquids from the kitchen to soak the apples in. I did make a suggestion of lemon juice, but let them choose the other things.
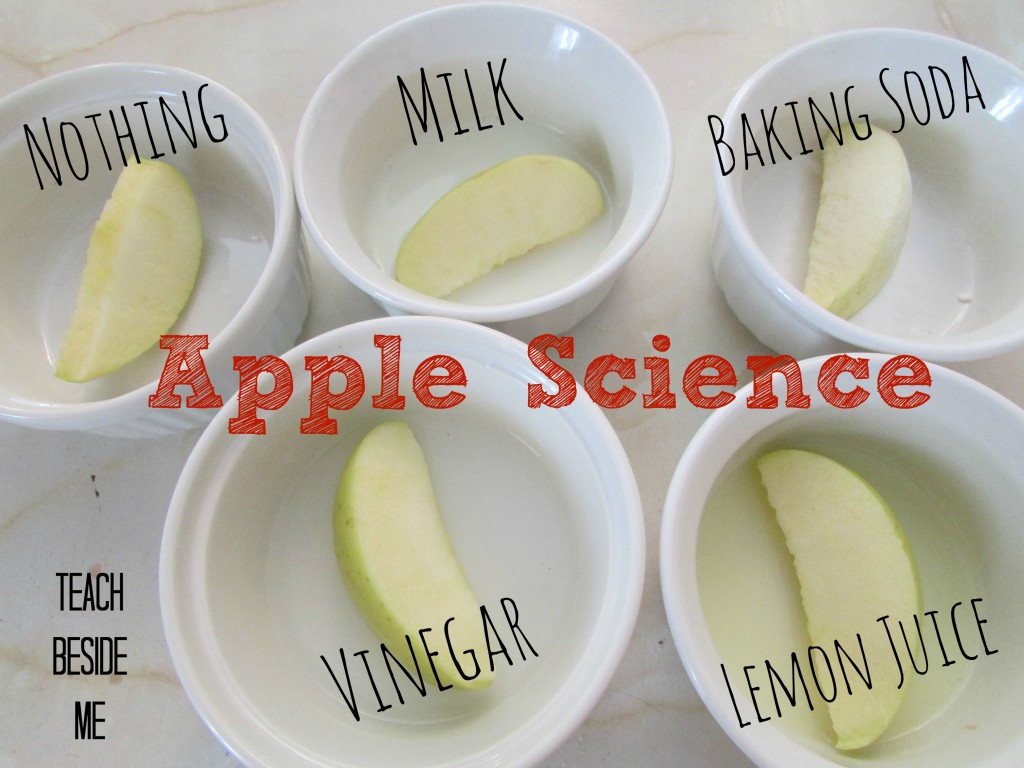
The kids chose vinegar, milk and baking soda . Another good one to try is salt water. Just to give them a comparison, I left one with nothing on it (the control variable). You could also use plain water as the variable.
We sliced the apples and put the slices into each substance to soak. Label them so you remember which one is which. We left the apple slices soaking for about an hour.
Let kids make their own hypothesis about which one will work best. They were excited to see the results. Their guesses were not correct… Check out my Scientific Method printables to help you teach this!

While some liquids might work better than others, taste is important, as well. If you soaked apples in salt water, they would not taste nearly as good!
How to Keep Apples from Turning Brown
I then explained to them that lemon juice helps keep the apple from browning, because it is full of ascorbic acid (Vitamin C) and it has a low pH level. Ascorbic acid works because oxygen will react with it before it will react with the enzymes in the apple. Once the ascorbic acid gets used up, the oxygen will start reacting with the enzymes in the apple (polyphenol oxidase) and browning will occur. Did you know why apples turn brown?
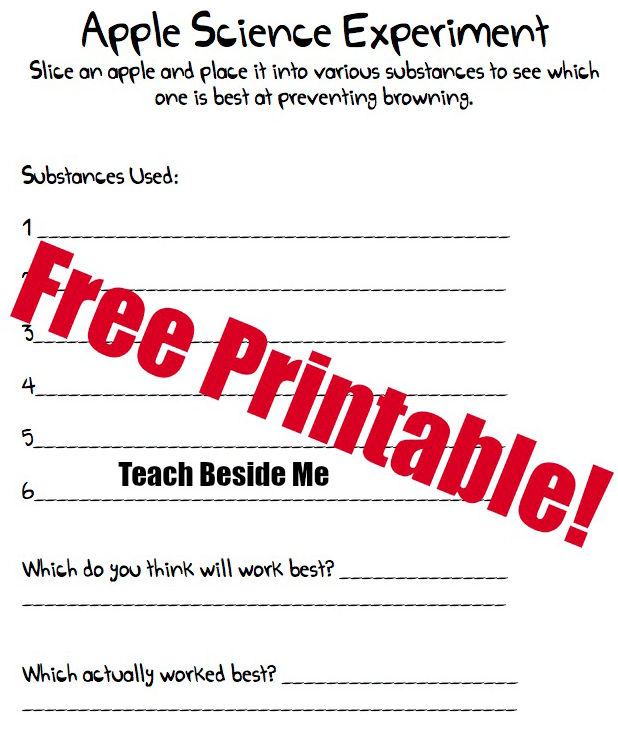
DOWNLOAD the free printable apple browning experiment worksheet now!
Want more simple science experiments? Check out this big list of Simple Science Experiments for Kids !
Also, a little more on Oxidation with this Rust Experiment !

A Few More Apple Learning Ideas:
A magnetic science activity to go along with the book 10 Apples Up on Top
Ways to Play with an Apple Carton
Pi Day with Apple Pie
All About Apples- Great list of apple learning and play ideas!
Extend the Learning with Some Apple Books:

How do Apples Grow? by Betsy Maestro
Apples by Gail Gibbons
The Season’s of Arnold’s Apple Tree by Gail Gibbons
Apples, Apples Everywhere by Robin Koontz
Apple Farmer Annie by Monica Wellington
Apples, Apples, Apples by Nancy Elizabeth Wallace
Save Save Save Save Save Save
Former school teacher turned homeschool mom of 4 kids. Loves creating awesome hands-on creative learning ideas to make learning engaging and memorable for all kids!
Similar Posts
Bitsbox ~ Coding for Kids

Printable Left Right Story for Christmas Party Games

Spelling Activity Box

How Many Days Are in Each Month?

Feed Me: Healthy Kids Nutrition Game

Food and Nutrition Unit
18 comments.
Always looking for more fun science experiments! Pinning this one!
I wonder what the variables are
the dependant variable is how much the apples browned and the independent variable is the liquid used
I hear you but then i still have a question, if you were to record in on a table or a graph for that matter, how would you measure how much it has browned? By sized? Because i am stuck now
This version of the experiment seems to generate a simple yes or no result as opposed to a measurable DV. If you need to quantify the dependent variable, perhaps try identifying quadrants on each apple slice and discussing the amount of browning as percentages? Or… maybe counting spots? I wonder if it might even be fruitful (pun intended) to look at the time it takes each liquid of independent variable to brown. No browning would be ‘n/a.’ You might even compare acidic (vinegar) vs. alkaline (baking soda).
- Pingback: 10 Apple Themed Learning Activities
Great science experiment! Can’t wait to try it with my kids.
This is such a great idea! My children LoVe apples. Doing an experiment with them makes total sense! Thanks for sharing 😉
Thanks! Glad you like it! 🙂
A tiny bit of honey also prevents browning. Like a drizzle and then shake to coat. Doesn’t work as long as lemon juice but also isn’t as tart.
use salt water also can prevent apple becoming browning!
What is the Variables like control, independent, and dependent, causes of this project.
Definitely going to be doing this for our picnic theme! Great idea
I use apple juice to keep apple slices from turning brown. It will even reverse light browning.
I will be doing this experiment with my daughter soon. I have always soaked apples in pineapple juice to prevent browning, and look forward to seeing how it compares to lemon juice!
also you could use a temporary vacuum chamber by taking a plastic bag and putting the apple inside of it . put the bag in to a bucket of water with the bag partially opened. the water pressure on the bag will force the air out of the bag and temporarily vacuum seal the bag. hope this helps 🙂
can you please provide a list of procedures
What common core standard would go with this science experiment?
Leave a Reply Cancel reply
You must be logged in to post a comment.
- Science, Tech, Math ›
- Chemistry ›
- Projects & Experiments ›
Effect of Acids and Bases on the Browning of Apples
Everything You Need for This Simple Experiment
Vesna Jovanovic/ EyeEm/Getty Images
- Projects & Experiments
- Chemical Laws
- Periodic Table
- Scientific Method
- Biochemistry
- Physical Chemistry
- Medical Chemistry
- Chemistry In Everyday Life
- Famous Chemists
- Activities for Kids
- Abbreviations & Acronyms
- Weather & Climate
- Ph.D., Biomedical Sciences, University of Tennessee at Knoxville
- B.A., Physics and Mathematics, Hastings College
Apples and other fruit will turn brown when they are cut and the enzyme contained in the fruit (tyrosinase) and other substances (iron-containing phenols) are exposed to oxygen in the air.
The purpose of this chemistry laboratory exercise is to observe the effects of acids and bases on the rate of browning of apples when they are cut and the enzymes inside them are exposed to oxygen.
A possible hypothesis for this experiment would be:
Acidity (pH) of a surface treatment does not affect the rate of the enzymatic browning reaction of cut apples.
Gather Materials
The following materials are needed for this exercise:
- Five slices of apple (or pear, banana, potato, or peach)
- Five plastic cups (or other clear containers)
- Vinegar (or dilute acetic acid )
- Lemon juice
- Solution of baking soda ( sodium bicarbonate ) and water (you want to dissolve the baking soda. Make the solution by adding water to your baking soda until it dissolves.)
- Solution of milk of magnesia and water (ratio isn't particularly important - you could make a mixture of one part water one part milk of magnesia. You just want the milk of magnesia to flow more readily.)
- Graduated cylinder (or measuring cups)
Procedure - Day One
- Lemon Juice
- Baking Soda Solution
- Milk of Magnesia Solution
- Add a slice of apple to each cup.
- Pour 50 ml or 1/4 cup of a substance over the apple in its labeled cup. You may want to swirl the liquid around the cup to make sure the apple slice is completely coated.
- Make note of the appearance of the apple slices immediately following treatment.
- Set aside the apple slices for a day.
Procedure and Data - Day Two
- Observe the apple slices and record your observations. It may be helpful to make a table listing the apple slice treatment in one column and the appearance of the apples in the other column. Record whatever you observe, such as the extent of browning (e.g., white, lightly brown, very brown, pink), the texture of the apple (dry? slimy?), and any other characteristics (smooth, wrinkled, odor, etc.)
- If you can, you may want to take a photograph of your apple slices to support your observations and for future reference.
- You may dispose of your apples and cups once you have recorded the data.
What does your data mean? Do all of your apple slices look the same? Are some different from others?
If the slices look the same, this would indicate that the acidity of the treatment had no effect on the enzymatic browning reaction in the apples. On the other hand, if the apple slices look different from each other, this would indicate something in the coatings affected the reaction.
First, determine whether or not the chemicals in the coatings were capable of affecting the browning reaction .
Even if the reaction was affected, this does not necessarily mean the acidity of the coatings influenced the reaction. For example, if the lemon juice-treated apple was white and the vinegar-treated apple was brown (both treatments are acids), this would be a clue that something more than acidity affected browning.
However, if the acid-treated apples (vinegar, lemon juice) were more/less brown than the neutral apple (water) and/or the base-treated apples (baking soda, milk of magnesia), then your results may indicate acidity affected the browning reaction.
Conclusions
You want your hypothesis to be a null hypothesis or no-difference hypothesis because it is easier to test whether or not a treatment has an effect than it is to try to assess what that effect is.
Was the hypothesis supported or not? If the rate of browning was not the same for the apples and the rate of browning was different for the acid-treated apples compared with the base-treated apples, then this would indicate that the pH ( acidity, basicity ) of the treatment did affect the rate of the enzymatic browning reaction. In this case, the hypothesis is not supported.
If an effect was observed (results), draw a conclusion about the type of chemical (acid? base?) capable of inactivating the enzymatic reaction.
Additional Questions
Here are some additional questions you may wish to answer upon completing this exercise:
- Based on your results, what substances in each apple treatment affected the enzyme activity responsible for the browning of the apples? Which substances did not appear to affect the enzyme activity ?
- Vinegar and lemon juice contain acids. Baking soda and milk of magnesia are bases. Water is neutral, neither an acid nor a base. From these results, can you conclude whether acids, pH neutral substances, and/or bases were able to reduce the activity of this enzyme (tyrosinase)? Can you think of a reason why some chemicals affected the enzyme while others didn't?
- Enzymes speed the rate of chemical reactions. However, the reaction may still be able to proceed without the enzyme, just more slowly. Design an experiment to determine whether or not the apples in which the enzymes have been inactivated will still turn brown within 24 hours.
- Acid & Base Science Fair Project Ideas
- How to Make a Baking Soda Volcano
- Poinsettia pH Paper
- How to Make Red Cabbage pH Paper
- How to Make a DNA Model out of Candy
- Science Fair Project Help
- Fruit Ripening and Ethylene Experiment
- Color Change Chemical Volcano Demonstration
- Why Thanksgiving Dinner Makes You So Sleepy
- How to Make Carbonated Fizzy Fruit
- How Much Water Is In an Apple
- How to Make Nitrocellulose or Flash Paper
- Cool Halloween Jack o Lanterns
- Vitamin C Determination by Iodine Titration
- Cool Dry Ice Experiments
- Breaking Bad Blue Crystal Meth Rock Candy Recipe
Optional Promo Message

The Apple Mystery: A Fun Oxidation Experiment for Kids
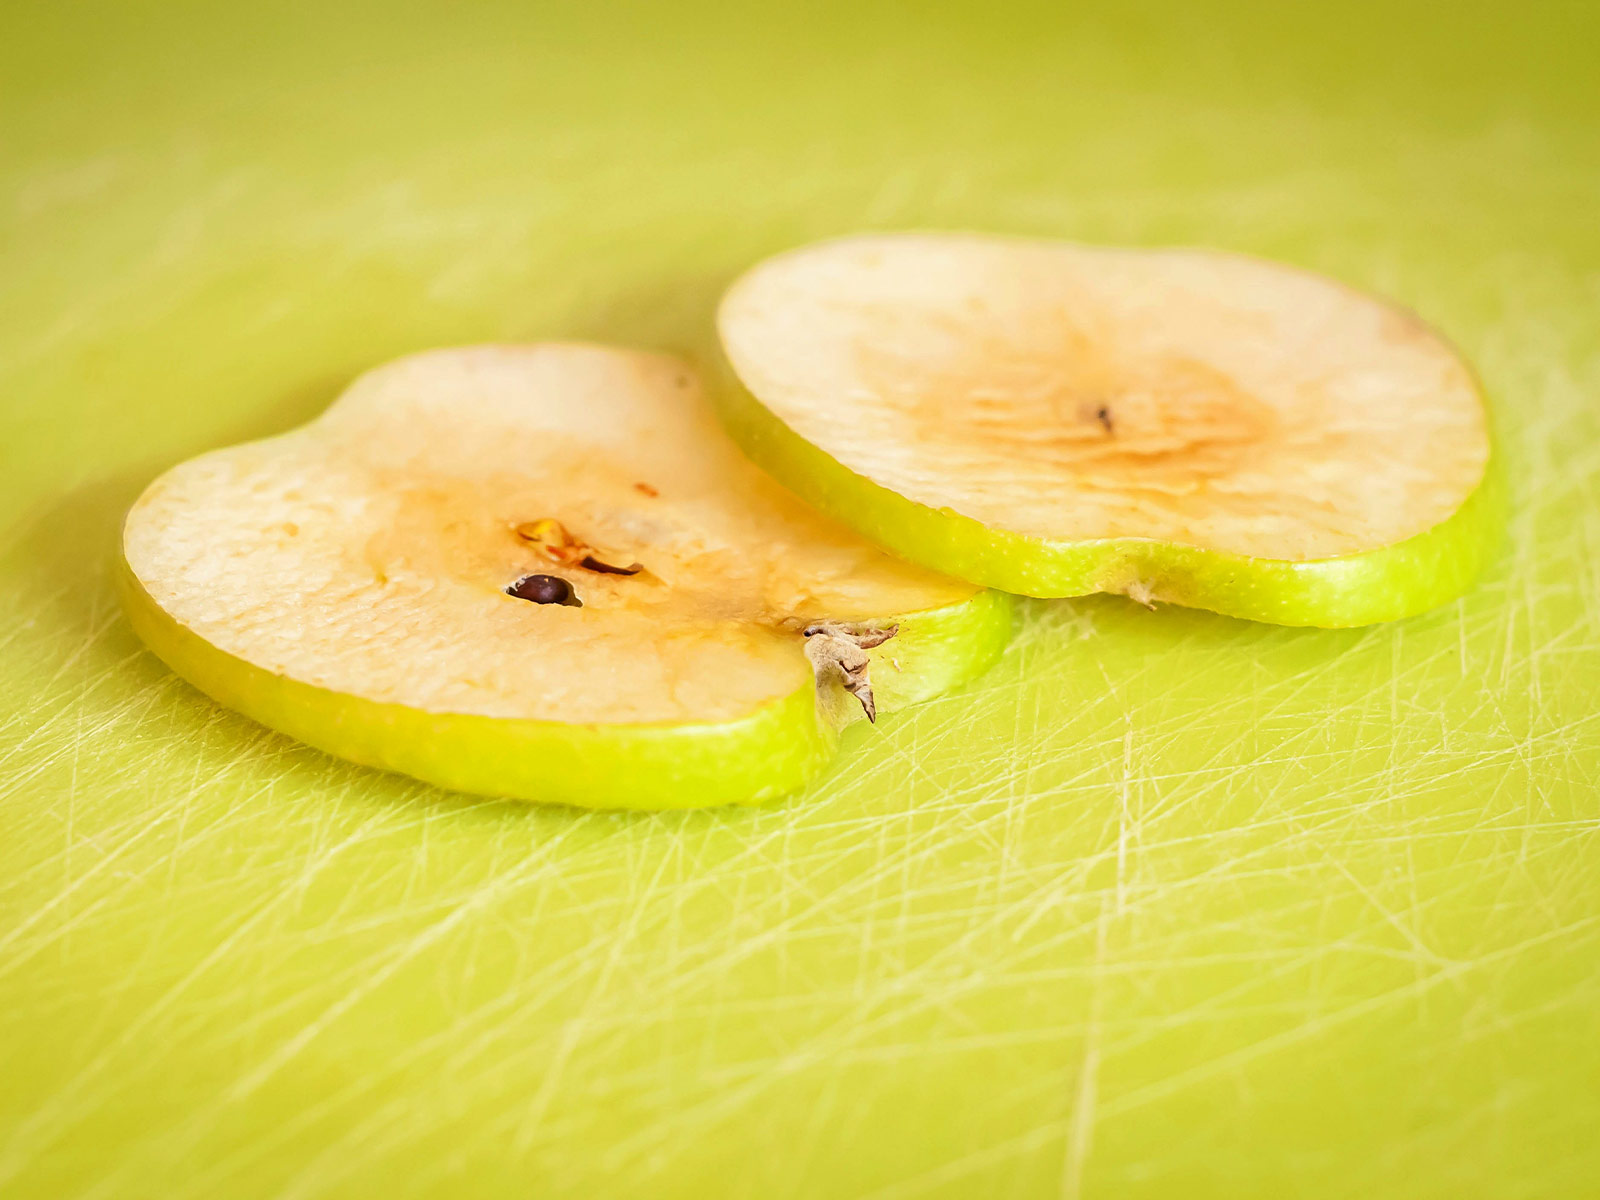
Have you ever wondered why apples turn brown after you slice them? With this fun experiment, you can become a detective and crack the case!
Materials:
- Sharp knife (with adult supervision)
- Cutting board
- 5 small bowls or containers
- Lemon juice
- Salt water (mix 1 teaspoon of salt with 1 cup of water)
- Baking soda water (mix 1 teaspoon of baking soda with 1 cup of water)
- Pen and paper
Let’s Experiment!
- Prepare your apple slices: Wash and dry the apple. Cut it in half and then into thin slices. Try to make the slices as even as possible.
- Label your bowls: Write the names of each liquid on separate pieces of paper and attach them to the bowls. You should have bowls labeled “lemon juice,” “vinegar,” “salt water,” “baking soda water,” and “water” (this is your control group).
- Dip and observe: Place one apple slice in each bowl. Make sure the slices are completely submerged in the liquids.
- Wait and watch: Set a timer for 30 minutes and observe the apple slices. Do they all start to brown at the same rate? The scientific term for the browning process is oxidation. Are some liquids more effective at preventing browning than others?
- Record your results: After 30 minutes, take out the apple slices and compare them. How brown are they? Write down your observations in a chart or table.
- Analyze the results: Which liquid did the best job of preventing browning? Which liquid had the least effect? Can you explain why?
Explanation:
When the apple flesh is exposed to air, the enzymes in the apple react with oxygen in the air, causing the browning. Lemon juice, vinegar, and salt water are acidic, which slows down the enzyme activity/ oxidation. Baking soda water is alkaline, which can speed up the browning process.
Bonus challenge: Try the experiment with different types of apples and see if the results are the same. You can also try different liquids, like soda or honey water, to see how they affect browning.
Be the First to Know
Sign up to receive exclusive content and offers from Blue Marble.

- Privacy Policy
- Terms & Conditions
- National Geographic
Learning Galaxy
- Food for thought
- Activity Lab
- Product Zone
- Parenting Hacks
© 2023 Blue Marble ™
- protein molecules
- catalysts that speed up cellular reactions
- not permanently changed in reactions they mediate
- specific to what they catalyze
- usually named with an –ase suffix

- lemon wedge
- paper plate
- Campbell, NA and Reece JB (2005) Biology. Seventh Edition.Pearson Education, Inc.
- Thorpe, P. ed. (2007) Biology 120 General Biology I: Laboratory Experiments & Exercises. Grand Valley State University.
- Enzyme Lecture Main Page from the Virtual Cell Biology Classroom .
- Science Demonstration of the Enzyme Bromelain : Why Fresh Pineapple Cannot Be Used in Jell-O , experiment from SPO.
- How Enzymes Work animation from McGraw-Hill.

- Interactive Enzyme Tutorial and quiz from Life: The Science of Biology.
- “ The Role Enzymes Play in the Body ” from Enzymedica. These guys are selling supplements. I don’t endorse the supplement, but their video is very instructive regarding enzymes and digestion.
- “ Assignment Discovery: Enzyme Catalysts ” from HowStuffWorks, a Discovery Company.
- Activation Energy animation from Pearson Prentice Hall.
- The Protein Song - song by MABS Music

- Earth Science
- Physics & Engineering
- Science Kits
- Microscopes
- Science Curriculum and Kits
- About Home Science Tools
Science Projects > Chemistry Projects > Why Does Lemon Juice Preserve Apples?

Why Does Lemon Juice Preserve Apples?
Why do apples turn brown?
See it happen, first, in the experiment below.
Then, find out how chemical reactions work to keep your apples (or pears) fresh even after they’ve been cut!
Lemon Juice on Apples
What you need:.
- An apple or pear
- Sharp knife
- Lemon juice
- Small bowl (big enough to fit half the apple or pear)
- Clock/timer
- Paper plates
- Pen and paper
What You Do:
1. Use your pen and paper to make two labels, one reading “control” and the other reading “lemon.”
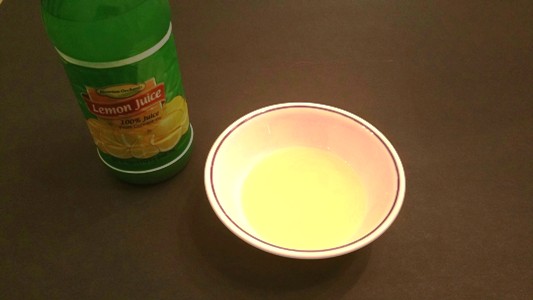
2. Pour lemon juice so it completely covers the bottom of the bowl.
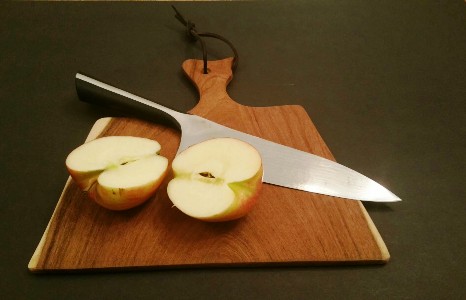
3. With adult help, cut the apple in half from top to bottom.
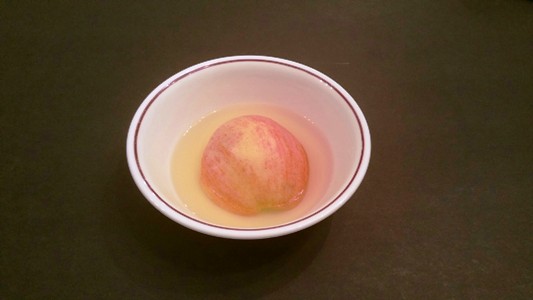
4. Take one apple half and place it cut-side down into the bowl of lemon juice. Leave it for two minutes. The other apple half without lemon juice is your ‘control’ sample that lets you see what normally happens to a cut apple.
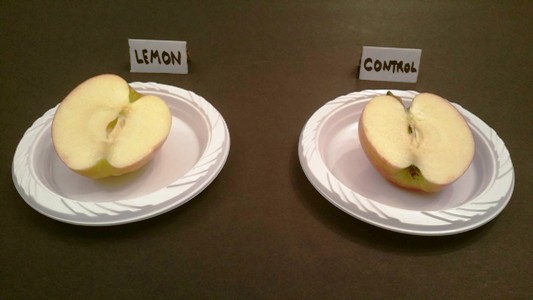
5. Observe the color of both apple halves, then place them white part up on the plates, with the corresponding labels nearby.
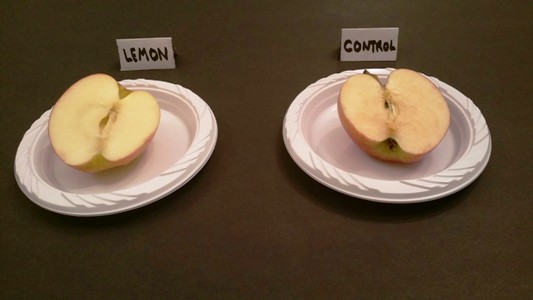
6. Observe the apples again at 10-minute increments, up to 30 minutes. Note any color changes and/or differences in appearance.
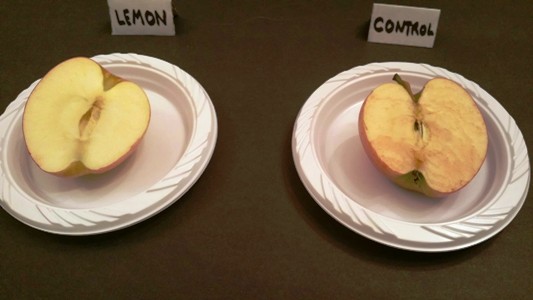
7. Look at the apples again periodically throughout the day. What do you find?
What Happened:
When an apple is cut open, an enzyme (proteins that cause chemical reactions) called polyphenol oxidase is released from the cells of the apple and reacts with the oxygen in the air. This reaction causes the fruit to turn brown, similar to rust forming on metal.
Almost all plants contain polyphenol oxidase. It’s believed plants use it for defense. When a plant is damaged, the browning of the affected area may discourage animals and insects from eating it. It may also work to heal the plant. The browning creates an antibacterial effect, limiting the spread of destructive germs.
Lemon juice, however, acts a preservative . Why? Because it’s full of ascorbic acid (an isolate of Vitamin C) and has a low (acidic) pH level.
Ascorbic acid reacts with oxygen before it reacts with polyphenol oxidase. Even when the ascorbic acid is used, the pH of the lemon juice prevents browning. That’s because polyphenol oxidase works best in the 5 to 7 range on the pH scale. Lemon juice’s pH level is about 2, which keeps the polyphenol oxidase inactive.
More food preservation options
In addition to lemon juice, lime juice and cranberry juice also have a pH below 3.0. Concord grape juice and grapefruit juice also have a low pH (not quite as low as the others), but will help delay the browning process. You may want to try several of these juices and find a tasty to way to serve sliced apples and pears in the process!
To learn more about acids, bases, and pH, check out this science lesson .
More Chemistry Projects:
- Acid Base Reactions & pH Experiments
- Starch Test for Plants
- Baked Alaska
- Green Eggs and Ham
Welcome! Read other Chemistry articles or explore the rest of the Resource Center, which consists of hundreds of free science articles!
Shop for Chemistry Supplies!
Home Science tools offers a wide variety of Chemistry products and kits. Find affordable beakers, test tubes, chemicals, kits, and everything else you need for lab experiments.
Related Articles
Science Fair Projects for 8th Graders
Science Fair Projects for 8th Graders As kids reach the 8th grade, their exposure to science goes up a notch. Equipped with basic knowledge, they can begin to explore more complicated concepts and satisfy their curiosity for deeper answers to the 'whys' and 'hows' of...
Science Fair Projects for 7th Graders
Science Fair Projects for 7th Graders Science fair projects for 7th graders are a step up in complexity. Because 7th graders have a better grasp of science concepts, they’re expected to practice the scientific method in the way they approach their experiments–which...
Home Science Experiments for Preschoolers
Home Science Experiments for Preschoolers Home science experiments for preschoolers are a great way to pique your child’s curiosity, teach them valuable knowledge, and allow them to have some fun in the comfort of their own home. There are plenty of activities your...
Easy Science Fair Projects for Kids
Easy Science Fair Projects for Kids Science fairs are a long-standing tradition that provide kids with the opportunity to better understand practical concepts in fun and innovative ways. The great thing about the experiments presented at these events is that they...
How to Make a Pollinator Hotel
Have you ever wondered how you can help provide habitat for pollinators like honey bees and butterflies in your back yard? Learn how to make a pollinator hotel with this step-by-step guide and lesson. Pollinators are animals that help move pollen. Most pollinators are...
JOIN OUR COMMUNITY
Get project ideas and special offers delivered to your inbox.
- Skip to primary navigation
- Skip to main content
- Skip to primary sidebar

- Alphabet Worksheets
- Coloring Pages
- Easy Science Experiments
- Nature Crafts
- Nature Books for Kids
- Number Charts
- Number Worksheets
- Printable Flashcards
- Printable Games
- Copyright. Disclosure. Privacy Policy

Apple Science Experiment with Worksheets
Published: Aug 23, 2021 · Modified: Jul 10, 2024 by Julie
- Save for Later!
Have you ever sliced an apple, only to find it has quickly turned brown? In this apple experiment, kids will observe how different liquids effect the process of apple browning.
Practicing science is fun and hands on with this classic science experiment!
- Science Concepts
If you are learning about science with your kids, simple science experiments are a fun way to practice the scientific method . One of the best ways to test out a hypothesis is through a hands on exploration.

This Post May Contain Affiliate Links. Please Read Our Disclosure Policy .
Why Do Apple Slices Turn Brown After being Cut?
Recommended age range, apple oxidation experiment worksheets, preparation, optional liquids, helpful hints, the science behind apple browning, concept of apple browning, more apple activities and project ideas, comparing different varieties of apples, storing in a plastic bag vs no bag, other browning fruits.
In this apple science experiment, kids will learn about the process of oxidation. Depending on the age of your kids, you can modify how much of this experiment they set up and run on their own.
A great activity to go along with this is to do an apple exploration with your kids to learn about the different parts of an apple.
If you are looking for ways to explore apples with your kids, check these additional apple activities for kids .

The great thing about experimenting with kids is that you can take a lesson and modify it to fit your needs.
If your child is practicing identifying variables and designing an experiment, they can be in charge of that part.
While for younger kids, you can provided a more guided approach.
When doing this with elementary aged kids, you can have them pick the liquids, help cut up the apples, and run the timer.
Younger kids can make observations, pour liquids, and drop the apple slices into the different containers.
Kids of all ages love having jobs, especially when running an experiment. Before you begin, decide who will be in charge of each task. Don't forget about clean up! Kids can be in charge of putting back supplies or washing containers.
Apple oxidation, commonly called browning, happens after an apple is sliced or damaged. Various liquids can be used to slow down apple browning. ( source )
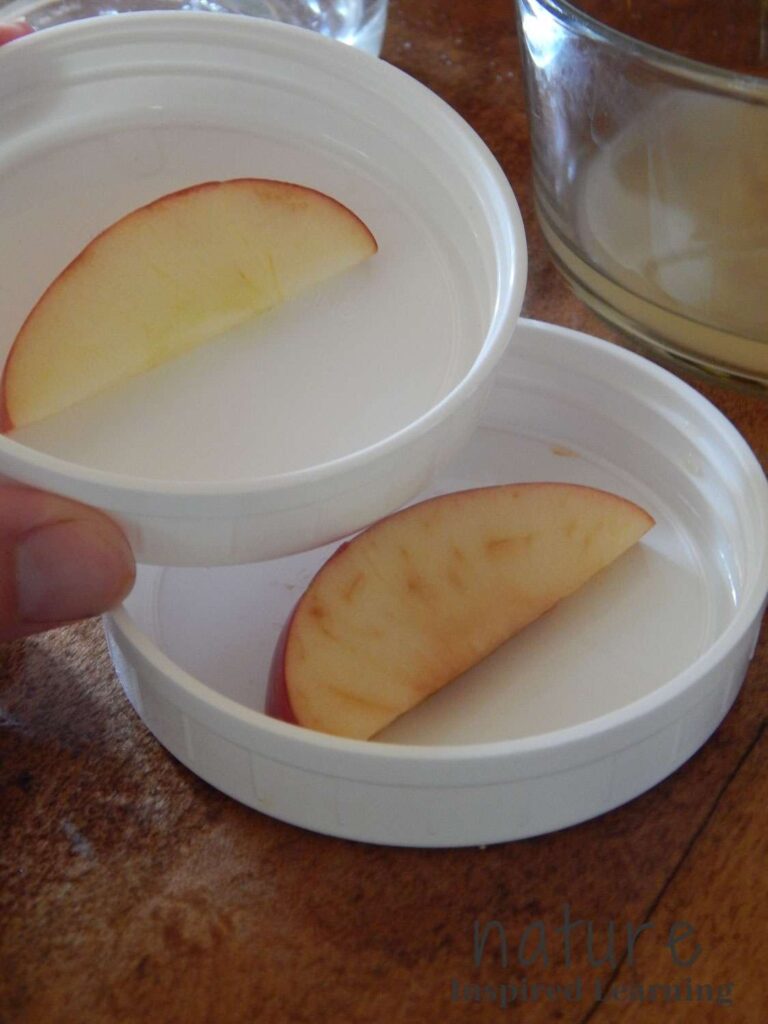
If you are doing this apple experiment with young children that will be enough of an explanation. However, a description of the process along with vocab terms if doing this with older children can be found later on in the post.
More Autumn Activities: Painting with Apples and Fall Leaf Printables
- Middle School
If I was going off of the description above I would say, middle school aged kids. But honestly, young kids even preschoolers will enjoy this experiment.
What is great about this science experiment is that you can tailor it to fit your child's needs.
Remember, you do not need to explain all of the fancy scientific concepts that are found later on in the post.

Lab sheets are great for elementary and middle school aged kids. Young children can simply discuss the changes you see.
There is also a guided version of the worksheet available for download as well. This version has some of the parts filled out for your child.
Directions for how to access the downloadable free printable worksheets is found at the bottom of this post.
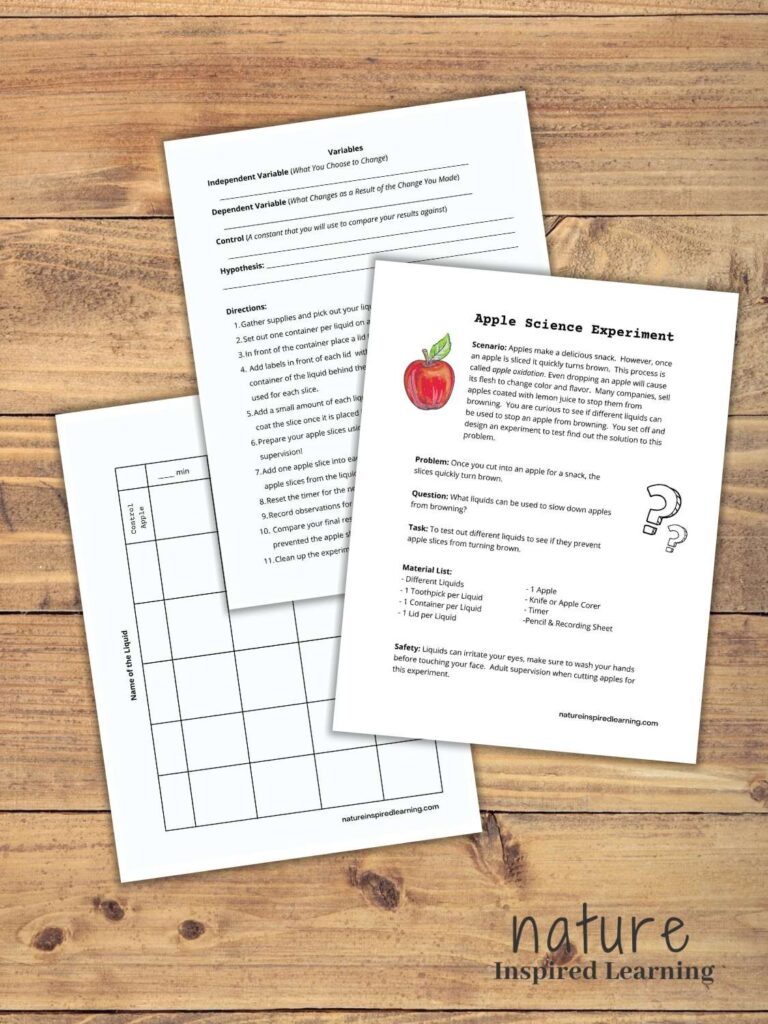
Before beginning this experiment you will want to gather a few supplies. First make sure you have apples! Depending on how many kids are doing this experiment will determine the amount of apples you need.
One apple is more than enough if you are doing it at your house with your kids.
If trying this out with a larger group, I would plan on having a few apples. I try to not be wasteful with food, so I sliced the apples very thinly.
Before doing the experiment with your kids, I would go over the directions, fill out the lab sheet, and talk about what you will be doing. Then begin the experiment with your kids.
Often times kids are so excited to get started that they miss out on practicing important science skills such as identifying variables and making a hypothesis.
Slicing the Apples
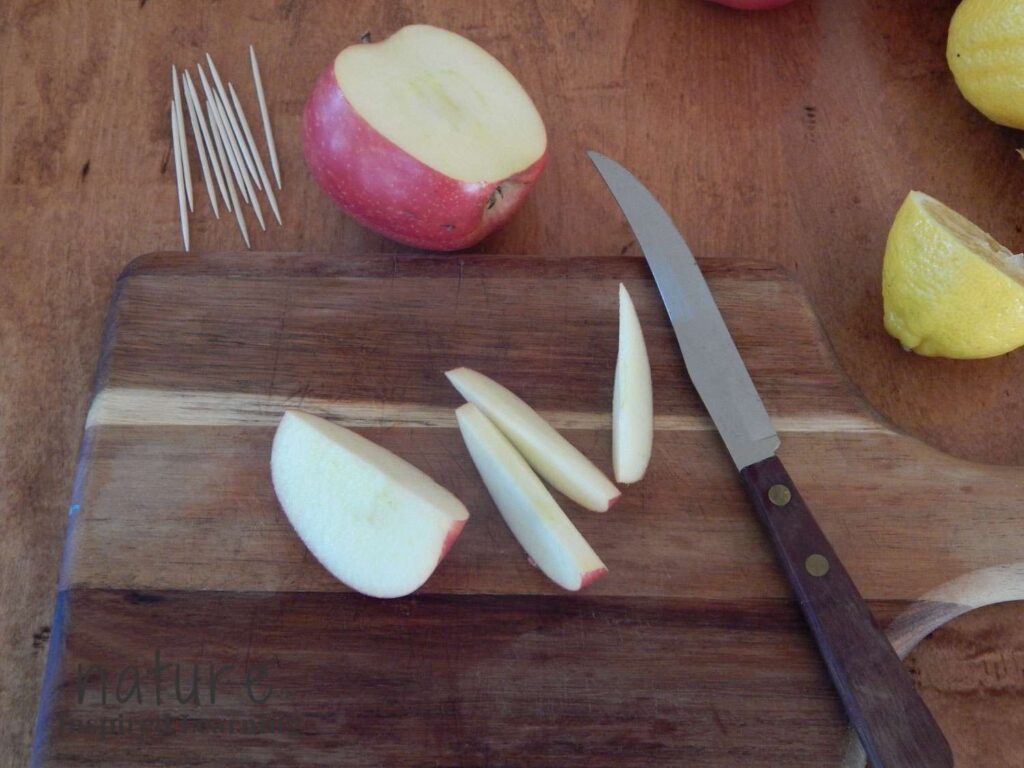
You will also need a safe way to cut the slices using either a knife or apple corer. I used a knife with a cutting board and cut the apples for my child.
Picking Out the Different Liquids
For this apple experiment, your kids will be testing out different solutions to see how well they prevent browning of the apple pieces.
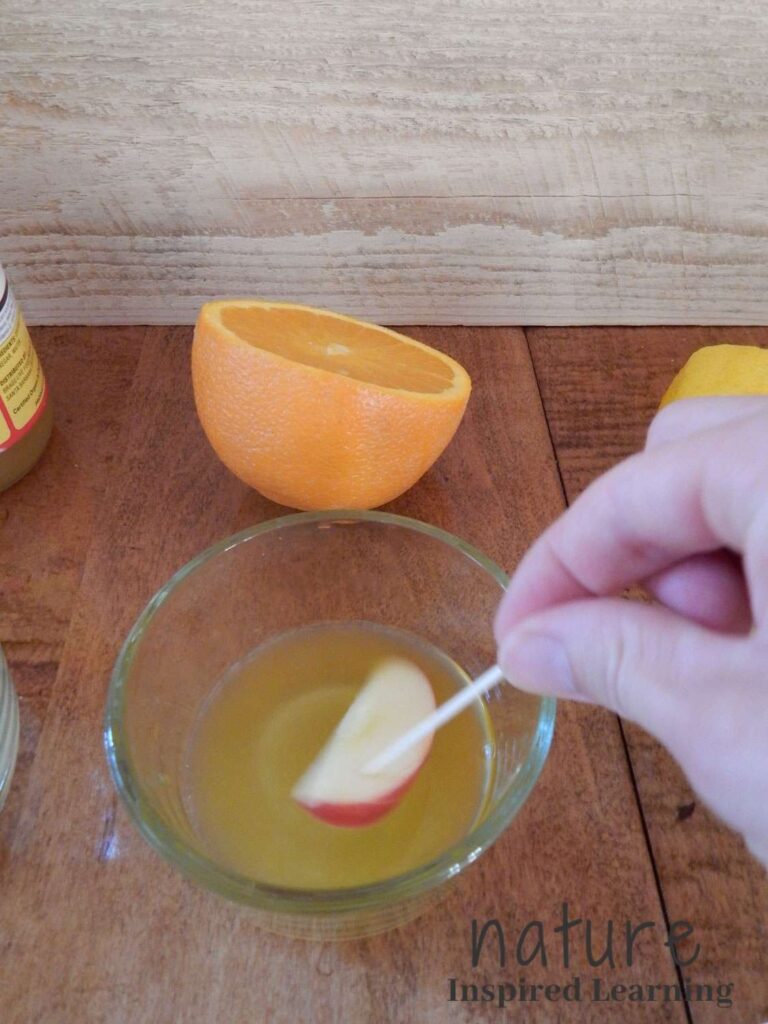
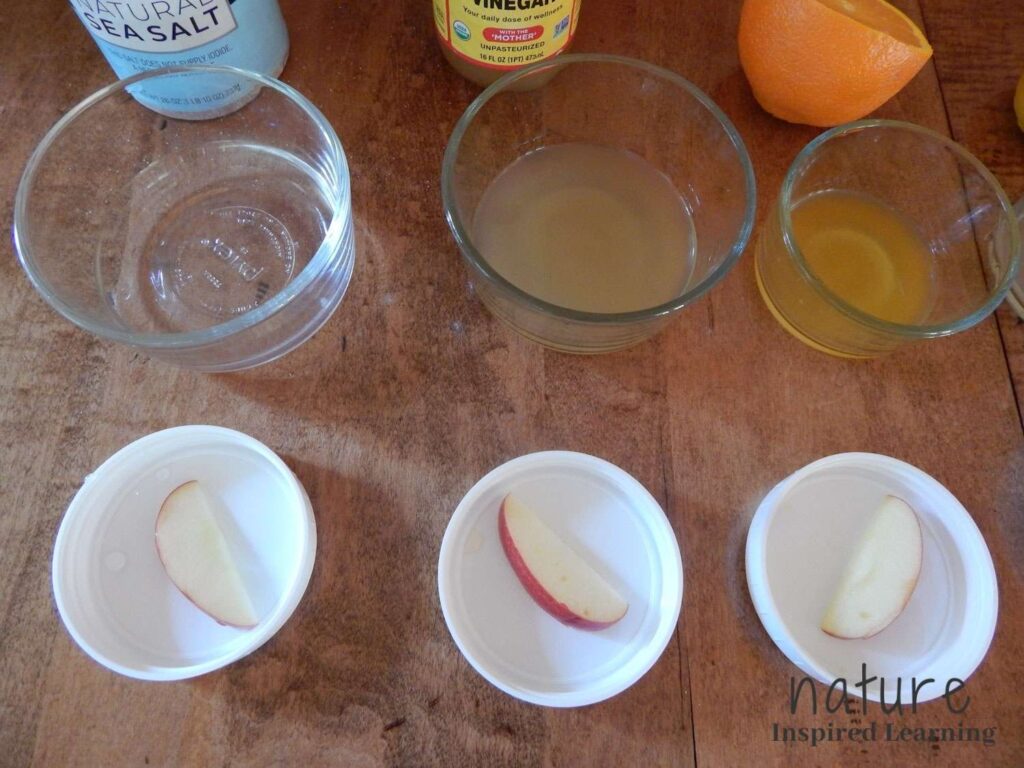
Pick out the different liquid substances before beginning this science project. You will also need containers to hold the liquids, I used small glass Pyrex containers .
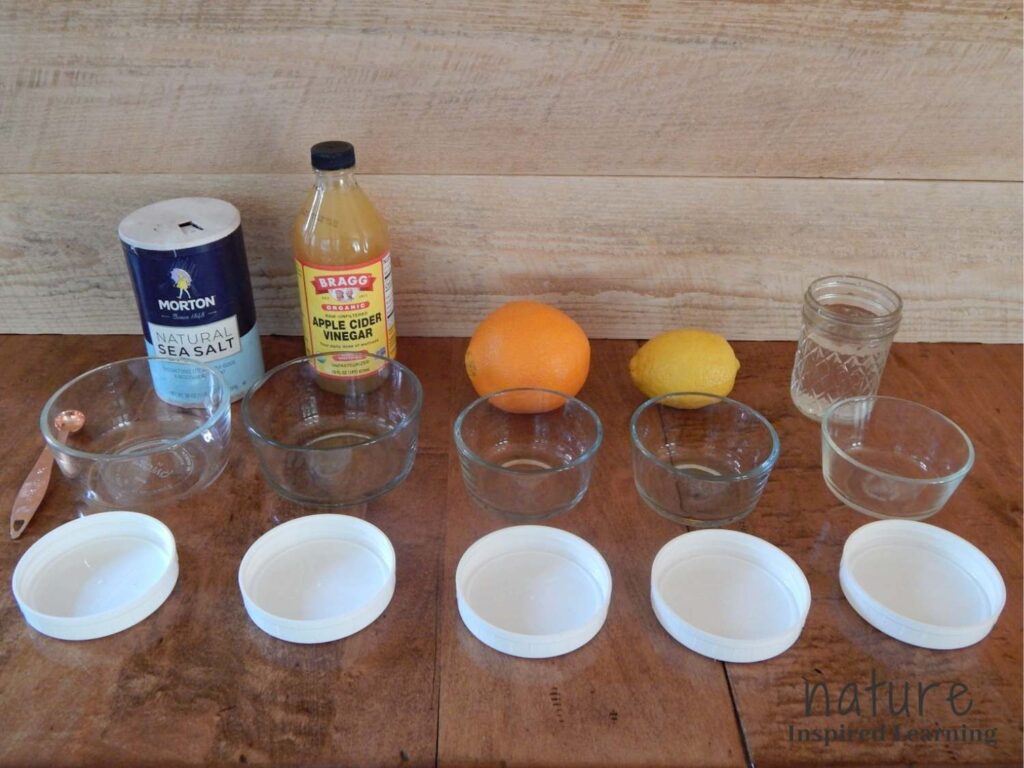
After the materials list below, I give you a few recommendations for liquids.
As you can see from the image above, I used salt water, apple cider vinegar, freshly squeezed orange and lemon juices, and plain water.
- 1 Container per Liquid
- 1 Lid per Liquid
- 1 Toothpick per Liquid
- 1 Knife or Apple Corer
- Cutting Board
- 4 or More Liquids
- Water (Control)
- Flat Work Surface
- Recording Sheet
- Optional: magnifying lens
All of these directions can be found on the downloadable lab sheet. Even if you do not use the sheet with your kids, it may be helpful to have printed directions.
- Gather supplies and pick out your liquids
- Set out one container per liquid on a table.
- In front of the container place a lid (this will hold the apple slice)
- Add labels in front of each lid with the name of the liquid or place the main container of the liquid behind the set up. You want to easily see which liquid was used for each slice.
- Add a small amount of each liquid into each of the containers. Enough liquid to coat the slice once it is placed in the liquid.
- Prepare your apple slices using a knife or apple corer. *As the adult, I cut the apples
- Add one apple slice into each of the liquids. Set the timer for 1 minute. Remove the apple slices from the liquids using a toothpick. Place slices onto the lids.
- Reset the timer for the next length of time then make your observation.
- Record observations for one minute, 10 minutes, 20 minutes, and 40 minutes.
- Compare your final results after 40 minutes to the control. Record which liquid prevented the apple slice from browning the most.
- Clean up the experiment. Then write your analysis and conclusion.

If you do not have lids available, parchment paper or plates can be used. I would not recommend placing wet apples directly onto a paper towel because the liquid can saturate the towel.
You can use more than four liquids, just make sure to plan one lid and glass container per liquid. Water will be the control which also needs a lid and container.
When I ran this experiment with my child, we used plain water as the control apple. However, I noticed the apple left out without being dipped into the water showed more signs of browning.
I recommend leaving a slice out on the table that never is dipped into a liquid. Kids can compare the results to that apple as well!
Now the fun part, the science behind why apples turn brown. Depending on the age of your child will determine how in depth you want to explain this process.
I broke up the vocab terms into simple and advanced.
However, you can do this fun science project without explaining all of the fancy science terms! I included them in case you want to go that route with your kids. Some kids love knowing the why behind what they are seeing.
Simple Vocab Terms
- apple or fruit
- guess or hypothesis
- observation
Advanced Vocab Terms
When apples turn brown, they are undergoing a chemical change as the slices are exposed to air.
If you happen to have older kids, they could also do this experiment along with researching the advanced vocab terms.
The source listed above has some great information about the process of apple oxidation.
The best thing about practicing science with kids is tapping into their natural gift of curiosity. Kids come up with the best ideas as they question how the world works.
Use one or all of these lesson extensions to explore more about apples with your kids.
Always make sure to have a control group so that you are conducting a true science experiment. Plan out the experiment using the scientific method before beginning.
It would be so much fun for kids to test out different kinds of apples. They can use the best liquid found from this experiment.
This is a great way to test out how well it works at keeping different kinds of apples from turning brown.
After doing the initial experiment your kids may wonder if the kind of apple will effect the browning process.

Many stores sell pre-sliced apples in plastic bags. With this fun experiment, have your kids test to see how apples placed in plastic bags compare to ones being left out in the open.
For a fun variation, kids can test to see if flattened out bags with most of the air removed will effect browning.
They can compare the results of flattened bags to ones having a large amount of air left inside.
Conduct an easy experiment similar to the apple science experiment. Have your kids brainstorm then pick out a few other fruits that also brown once sliced.

If they are not sure if any other fruits change color they can do a science project where they slice a variety of fruits and observe the changes in color.
Then they can test out different liquids and record the results. It would be fun to see if the same liquids had similar results for different fruits.
Make sure to download your free copy of the apple experiment below!

Terms of Use
These worksheets were created by Nature Inspired Learning and are for personal use only for your home, classroom, or public library see full disclosure . All of these apple experiment worksheets are for non-commercial use .
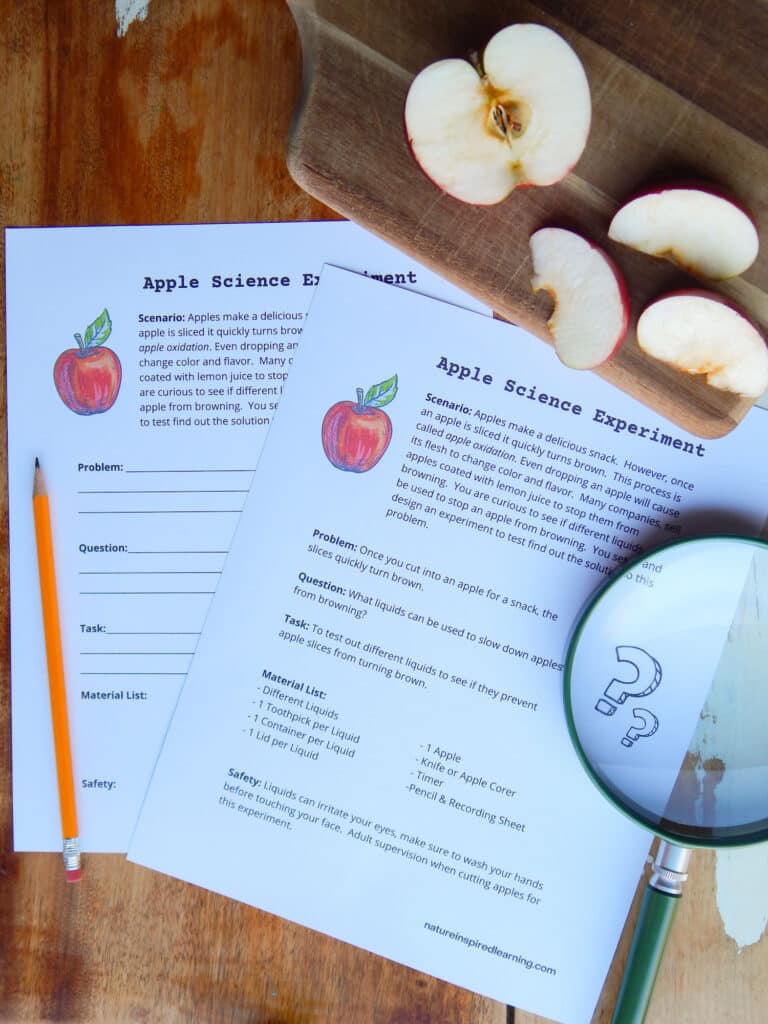
Two different versions: a guided version and a blank activity sheet.
More Easy Science Experiments

Reader Interactions
October 28, 2021 at 10:22 am
Oh my kids will love this! Thanks for all the information. Can’t wait to try it!
October 30, 2021 at 1:17 pm
Your very welcome Ashley, I hope your kids enjoy the experiment
October 28, 2021 at 10:36 am
What a fun experiment! I am going to have to do this with my class!
Awesome! I hope they enjoy conducting the experiment
October 28, 2021 at 11:51 am
You have so many great tips for doing this experiment! Great idea!
Thank you Laura
October 28, 2021 at 4:22 pm
So many great ideas here that anyone could do! Thanks for sharing!
October 30, 2021 at 1:18 pm
Thank you Kelsey! Yes easy to do even as a spur of the moment activity when cooking with apples
October 28, 2021 at 7:39 pm
I love this apple science experiment! It is a fun way to learn science. Thank you so much for sharing!!!
October 30, 2021 at 1:19 pm
Your very welcome Ada
January 22, 2023 at 11:15 pm
My children love apples. These will be so fun! Julie, on these cold days, do you know how to make fake snow ? Cindy
January 23, 2023 at 11:14 am
I'm not sure about how to make fake snow possibly with baking soda and water (however it wouldn't be safe to eat)? Or if you are able to use a mini snow cone machine that grinds up ice to make "snow" that would be fun too!
August 28, 2023 at 3:30 pm
I'd love the Apple Oxidation Lab freebie, thanks!
August 28, 2023 at 3:34 pm
Hi Farren, There is a sign up form at the end of the post for a PDF version of the activity sheets. Best, Julie
September 04, 2023 at 8:21 pm
I love this so much!
September 05, 2023 at 6:09 am
Hi Stacey! Enjoy, happy exploring
Josie Heflin
September 17, 2023 at 11:10 pm
I'm super excited to do this with my son!!! Thank you so much for this!!!
September 23, 2023 at 9:35 am
You're very welcome! I hope you both have fun.
Leave a Reply Cancel reply
Your email address will not be published. Required fields are marked *

IMAGES
VIDEO
COMMENTS
In this project, you can apply pectinase to fruit under controlled experimental conditions in order to investigate the enzyme activity of pectinase. You can monitor the enzyme activity by measuring how much juice is produced under the various experimental conditions.
Learn what keeps apples from browning in this apple oxidation science experiment. Put apple slices in different solutions to find out which one is the best at preventing the apples from turning brown.
Once the ascorbic acid gets used up, the oxygen will start reacting with the enzymes in the apple (polyphenol oxidase) and browning will occur. Did you know why apples turn brown? DOWNLOAD the free printable apple browning experiment worksheet now!
Apples and other fruit will turn brown when they are cut and the enzyme contained in the fruit (tyrosinase) and other substances (iron-containing phenols) are exposed to oxygen in the air. The purpose of this chemistry laboratory exercise is to observe the effects of acids and bases on the rate of browning of apples when they are cut and the ...
In this vitamin c apple experiment we get to see enzymes in action and learn how to prevent the same enzyme activity. This Vitamin C and apple experiment post includes a free printable that can be used with multiple grades, including middle and high school.
Have you ever wondered why apples turn brown after you slice them? With this fun experiment, you can become a detective and crack the case! Materials: Let’s Experiment! Prepare your apple slices: Wash and dry the apple. Cut it in half and then into thin slices. Try to make the slices as even as possible.
an enzyme in the apple called polyphenol oxidase. Enzymes speed up chemical reactions – in this case, speeding up the browning of the apple by releasing melanin. This chemical reaction, called “enzymatic browning,” can be simplified to: Polyphenol Oxidase (enzyme in the apple) + Oxygen (in the air) → Melanin (brown color)
Easy Enzyme Experiment Using Apples. This experiment is so simple that it can be done in any classroom, and requires no special scientific equipment. The supplies for each student include one of each of the following: 1.
Find out why lemon juice keeps apples from turning brown with HST's Lemon Juice on Apples experiment. Learn more about acids, bases and pH now!
Have you ever sliced an apple, only to find it has quickly turned brown? In this apple experiment, kids will observe how different liquids effect the process of apple browning. Practicing science is fun and hands on with this classic science experiment!