- PRO Courses Guides New Tech Help Pro Expert Videos About wikiHow Pro Upgrade Sign In
- EDIT Edit this Article
- EXPLORE Tech Help Pro About Us Random Article Quizzes Request a New Article Community Dashboard This Or That Game Forums Popular Categories Arts and Entertainment Artwork Books Movies Computers and Electronics Computers Phone Skills Technology Hacks Health Men's Health Mental Health Women's Health Relationships Dating Love Relationship Issues Hobbies and Crafts Crafts Drawing Games Education & Communication Communication Skills Personal Development Studying Personal Care and Style Fashion Hair Care Personal Hygiene Youth Personal Care School Stuff Dating All Categories Arts and Entertainment Finance and Business Home and Garden Relationship Quizzes Cars & Other Vehicles Food and Entertaining Personal Care and Style Sports and Fitness Computers and Electronics Health Pets and Animals Travel Education & Communication Hobbies and Crafts Philosophy and Religion Work World Family Life Holidays and Traditions Relationships Youth
- Browse Articles
- Learn Something New
- Quizzes Hot
- Happiness Hub
- This Or That Game
- Train Your Brain
- Explore More
- Support wikiHow
- About wikiHow
- Log in / Sign up
- Education and Communications

How to Do Simple Chromatography
Last Updated: October 25, 2024 Fact Checked
This article was co-authored by Bess Ruff, MA . Bess Ruff is a Geography PhD student at Florida State University. She received her MA in Environmental Science and Management from the University of California, Santa Barbara in 2016. She has conducted survey work for marine spatial planning projects in the Caribbean and provided research support as a graduate fellow for the Sustainable Fisheries Group. This article has been fact-checked, ensuring the accuracy of any cited facts and confirming the authority of its sources. This article has been viewed 211,150 times.
Mixtures are composed of two or more components that have different properties. There are many methods used to separate mixtures into their basic components. For fluids, one method is chromatography whikch separates the mixture into its components because of the relative abilities of the mobile phases to move through stationary phases. Some components of the mixture move through more easily, while others are held back. This causes the mixture to separate into bands of different components.
Things You Should Know
- Cut a coffee filter into strips and draw a line 1 in (2.5 cm) from the bottom of each strip with a marker.
- Lower a strip into a cup of water so the line is close to the water but not submerged. Watch the marker color creep up the filter to create colored bands.
- Inspect the colored bands on the strip. Lighter shades will travel further than darker ones because they have smaller compounds that move faster.
Creating a Sample

- Paper towels, or any other paper, can be substituted for the coffee filter.

- In place of a line, some people use a dot. This will work as well, but the bands will not be as clearly defined using this method.

- You can hang the strip with paper clips, tape, or any other mechanism you see fit.
Introducing a Solvent

- An example apparatus would be to have the clothespin that is holding the strip clamped to a pencil lying across the top of the glass. This way, the strip dangles down and just barely touches the water.

- The exact time it takes the water to reach 1 inch (2.5 cm) from the top of the strip will depend on what kind of strip you are using.
- Don't carry the system after submerging the strip; avoid any stirring that will affect the result by diffusion of bands.
Observing the Bands

- The ratio of the distance a compound moved (Dc) to the distance the solvent moved (Ds) is called the Rf value. You can calculate the Rf value for any band by dividing the distance the band traveled from the original line to the distance the solvent traveled from the original line. [9] X Research source
- Rf = 2 inches / 5 inches
Community Q&A
- If you wish to do this more scientifically, you can actually buy chromatography paper, which is similar to a coffee filter but creates a much more distinct and less blurry strip of colors when used properly. This is available through various lab equipment suppliers. Thanks Helpful 1 Not Helpful 0
- Try different colored markers, and notice which reaches the top first, which creates the prettiest strip of pigments, and so on. Thanks Helpful 1 Not Helpful 0
- Chromatography is used in actual scientific labs for various reasons, and can actually become quite complex. Chromatography includes a wide variety of scientific tests and is not limited to this method. Thanks Helpful 0 Not Helpful 0

- Be careful to not submerge the mark on the filter. This will ruin the chromatography. Thanks Helpful 19 Not Helpful 7
- Let the mark dry. Thanks Helpful 5 Not Helpful 1
Things You'll Need
- Coffee filter
- Black marker
You Might Also Like

- ↑ https://sciencing.com/simple-chromatography-experiments-9589.html
- ↑ https://www.khanacademy.org/science/class-11-chemistry-india/xfbb6cb8fc2bd00c8:in-in-organic-chemistry-some-basic-principles-and-techniques/xfbb6cb8fc2bd00c8:in-in-methods-of-purification-of-organic-compounds/a/principles-of-chromatography
- ↑ https://www.teachengineering.org/activities/view/wst_environmental_lesson02_activity1
- ↑ https://chem.libretexts.org/Bookshelves/Analytical_Chemistry/Supplemental_Modules_(Analytical_Chemistry)/Instrumentation_and_Analysis/Chromatography/V._Chromatography/E._Paper_Chromatography
- ↑ http://www.bbc.co.uk/schools/gcsebitesize/science/add_edexcel/covalent_compounds/seperationrev2.shtml
About This Article

To do simple chromatography, start by cutting a straight strip out of a coffee filter or paper towel. Next, measure 1 inch up from the bottom of the strip and use a black marker to draw a straight line. Then, secure the strip to a pencil with tape so that it hangs vertically. Once the strip is ready, put water in a cup and lower the strip in so the line stays dry but everything below it is submerged, and wait as the water moves all the way up the strip. Finally, remove the strip and observe the bands created by the marker traveling up the strip. To learn how to list the bands and their compounds, keep reading! Did this summary help you? Yes No
- Send fan mail to authors
Reader Success Stories
Md. Sociopath
Oct 12, 2017
Did this article help you?
Apr 25, 2018
Oct 6, 2020
David Mulilo
Jan 28, 2018
Alana Bartlet
Oct 3, 2017

Featured Articles

Trending Articles

Watch Articles

- Terms of Use
- Privacy Policy
- Do Not Sell or Share My Info
- Not Selling Info
Get all the best how-tos!
Sign up for wikiHow's weekly email newsletter
- Skip to primary navigation
- Skip to main content
- Skip to primary sidebar

- FREE Experiments
- Kitchen Science
- Climate Change
- Egg Experiments
- Fairy Tale Science
- Edible Science
- Human Health
- Inspirational Women
- Forces and Motion
- Science Fair Projects
- STEM Challenges
- Science Sparks Books
- Contact Science Sparks
- Science Resources for Home and School
Paper Chromatography Experiment
March 17, 2021 By Emma Vanstone Leave a Comment
This simple felt tip pen paper chromatography experiment is a great way to learn about this particular method of separating mixtures .
WHAT IS CHROMATOGRAPHY?
Chromatography is a technique used to separate mixtures. Information from a chromatography investigation can also be used to identify different substances.
In chromatography, the mixture is passed through another substance, in this case, filter paper. The different-coloured ink particles travel at different speeds through the filter paper, allowing the constituent colours of the pen ink to be seen.
All types of chromatography have two phases: a mobile phase where the molecules can move and a stationary phase where they can’t move. In the case of paper chromatography, the stationary phase is the filter paper, and the mobile phase is the solvent ( water ).
The more soluble the ink molecules, the further they are carried up the paper.
The video below shows chromatography in action.
You’ll need:
Filter paper or paper towel
Felt tip pens – not washable or permanent
A container – glass, jar or plate
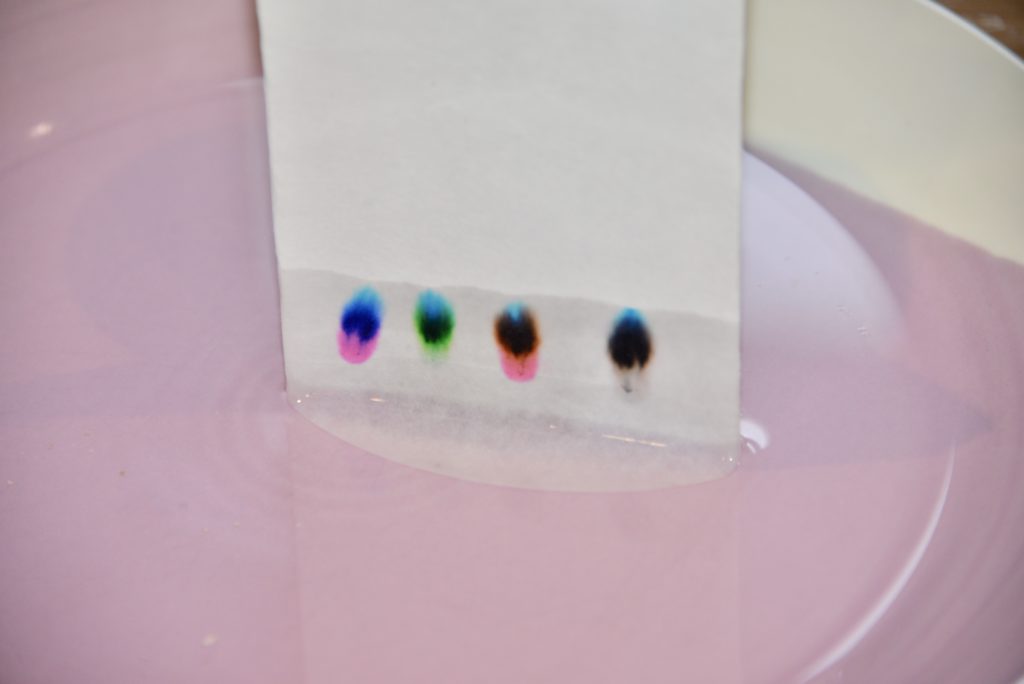
Instructions
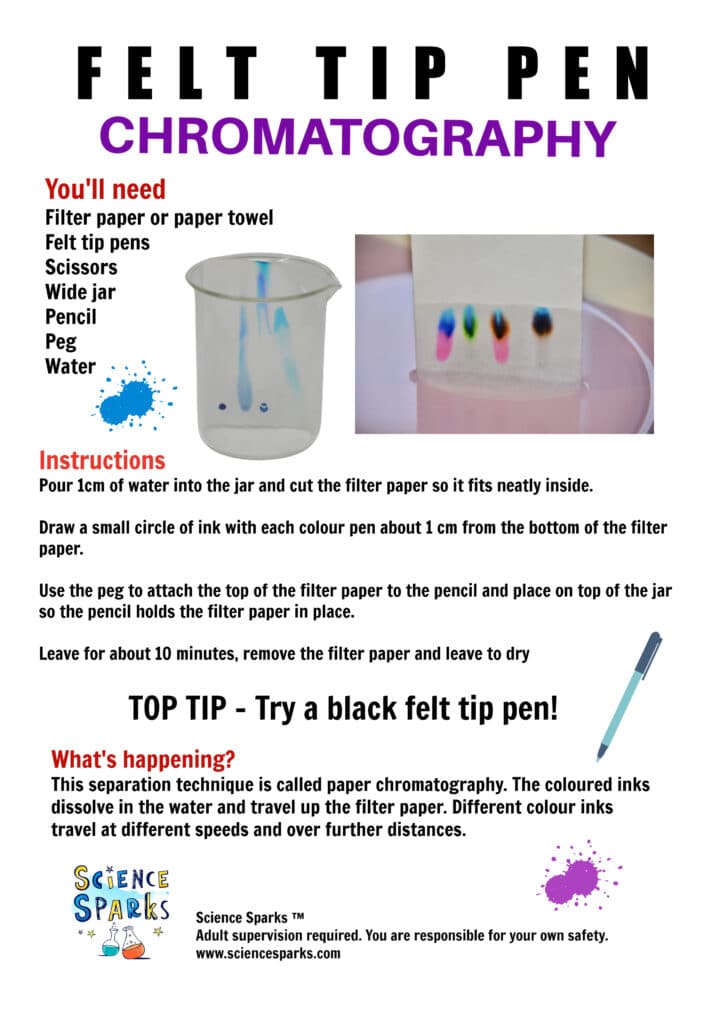
Pour a small amount of water onto a plate or into the bottom of a jar.
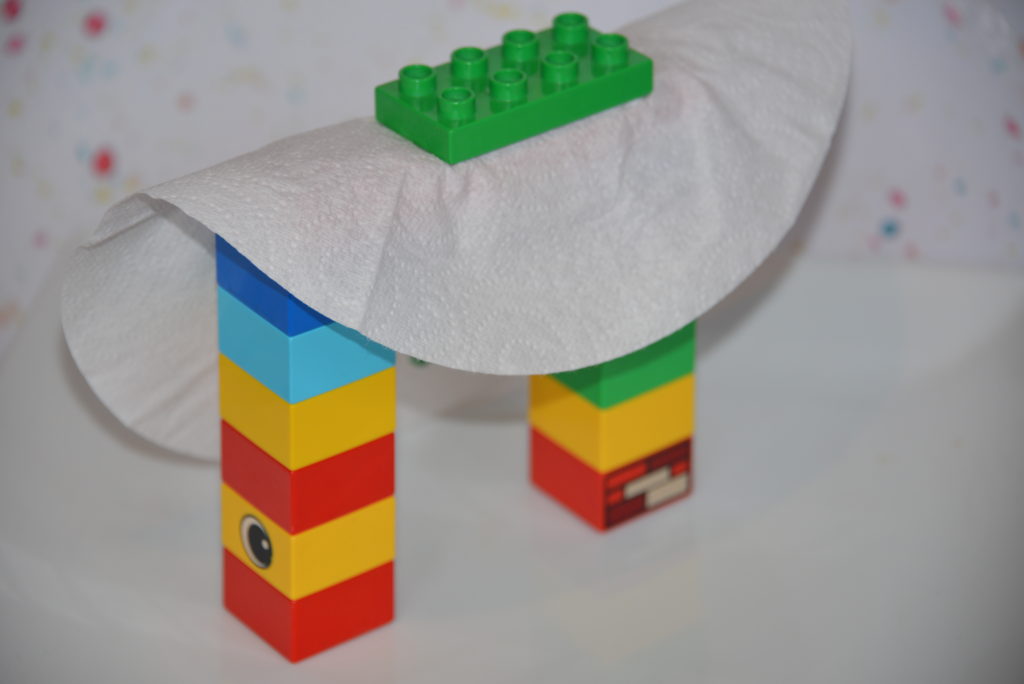
Find a way to suspend the filter paper over the water so that just the very bottom touches the water. If you do the experiment in a jar, the easiest way to do this is to wrap the top of the filter paper around a pencil, clip it in place, and suspend it over the top of the jar.
Our LEGO holder worked well, too!
Use the felt tip pens to draw a small circle about 1cm from the bottom of the filter paper with each colour pen you want to test.
Suspend the filter paper in the water and watch as the ink moves up the filter paper.
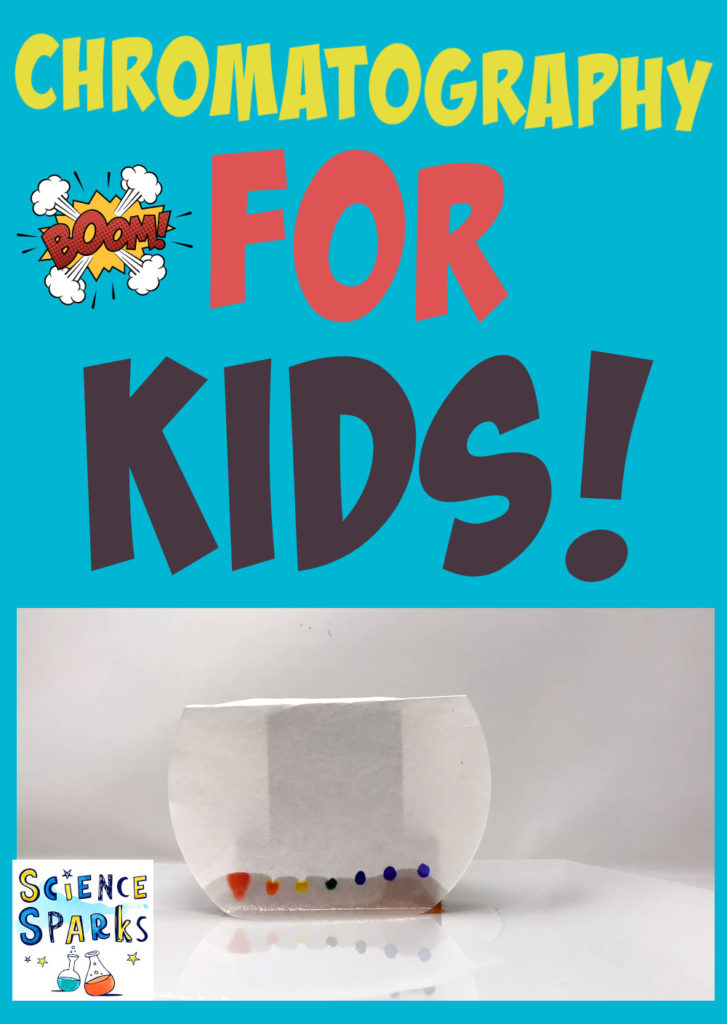
You should end up with something like this! The end result is called a chromatogram.
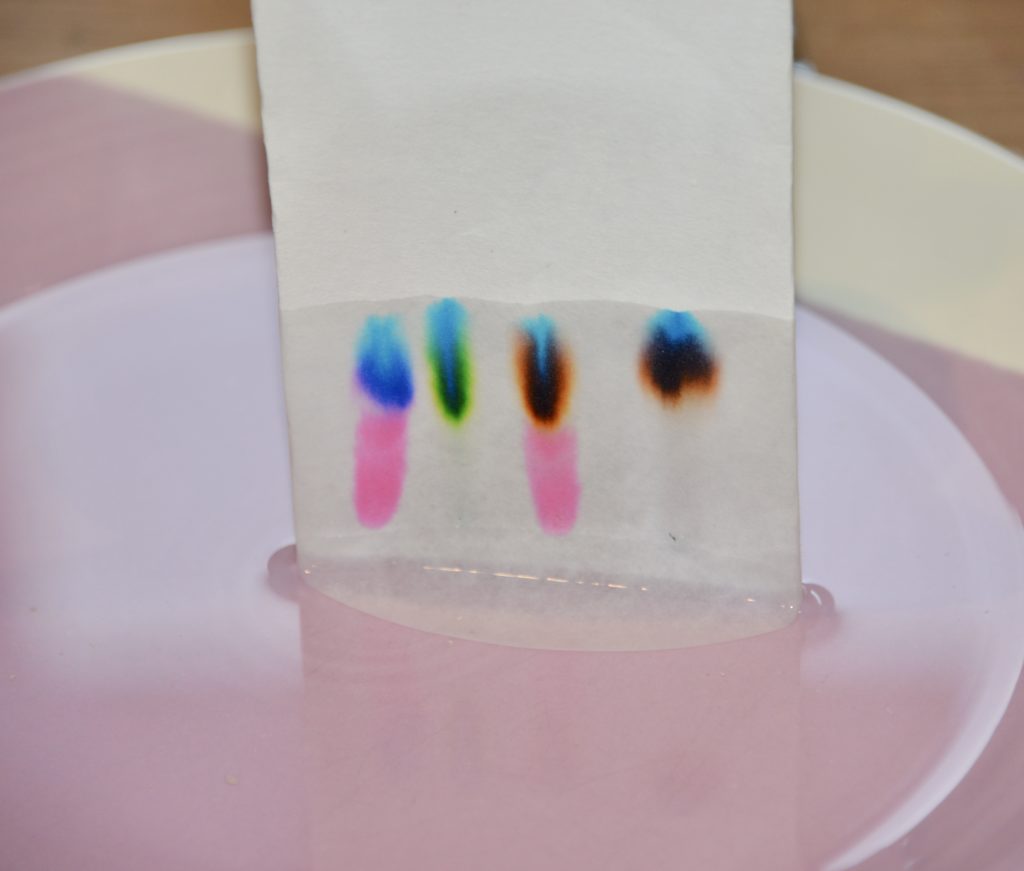
What happens if you use washable pens?
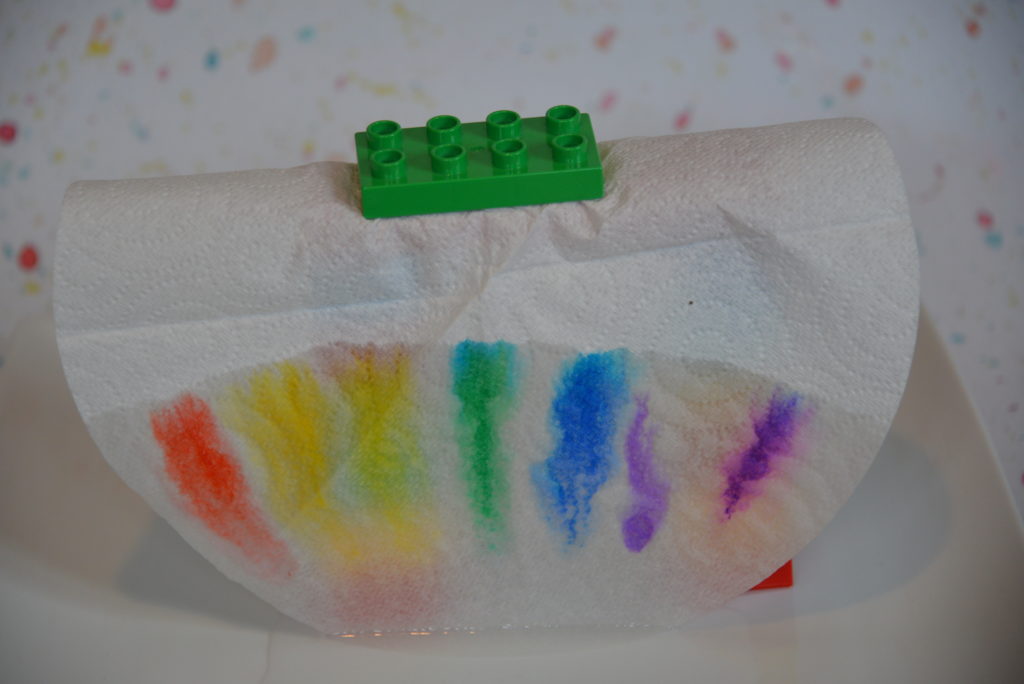
If the inks are washable, they tend to contain just one type of ink, so there is no separation of colour.
Below, only a couple of the inks have separated compared to the non-washable pens above.
Why does chromatography work?
When the filter paper containing the ink spots is placed in the solvent ( in this case, water ), the dyes travel through the paper.
Different dyes in ink travel through the chromatography filter paper at different speeds. The most soluble colours dissolve and travel further and faster than less soluble dyes, which stick to the paper more.
I’ve created a free instruction sheet and chromatography experiment write up to make the activity even easier.
Extension task
Experiment with different types and colours of pens. Depending on the type of ink used, some will work better than others.
Try chromatography with sweets .
Steamstational also has a great leaf chromatography investigation.
More separation experiments
Clean up water by making your own filter .
Separate water and sand by evaporation .
Make colourful salt crystals by separating salt and water.
Separate liquid mixtures with a bicycle centrifuge .
Last Updated on May 20, 2024 by Emma Vanstone
Safety Notice
Science Sparks ( Wild Sparks Enterprises Ltd ) are not liable for the actions of activity of any person who uses the information in this resource or in any of the suggested further resources. Science Sparks assume no liability with regard to injuries or damage to property that may occur as a result of using the information and carrying out the practical activities contained in this resource or in any of the suggested further resources.
These activities are designed to be carried out by children working with a parent, guardian or other appropriate adult. The adult involved is fully responsible for ensuring that the activities are carried out safely.
Reader Interactions
Leave a reply cancel reply.
Your email address will not be published. Required fields are marked *
Simple Chromatography Experiments
Chromatography is a method you can use to separate and analyze the individual components of complex mixtures, ranging from ink to amino acids to vapors. Chromatography requires a stationary phase as an immovable platform that the mobile phase — the water or other solvent to carry the mixture to be separated — moves through. Porous household papers like paper towels and coffee filters make an inexpensive substitute for chromatography paper.
Paper chromatography can separate the colors in black ink using simple household materials. Draw a pencil line one inch from the end of a coffee filter paper strip. Draw a short line along the pencil line using a water-soluble black marker. Pour just enough water to cover the bottom of a one-liter jar, and place the bottom edge of the paper into the jar, making sure the pencil line is above the water level. The solvent will travel up the paper, separating the black ink into multiple color shades. Remove the paper and measure the relative proportions of color you obtain when the solvent stops moving or is within one inch from the top.

Tablet Candy
This experiment shows the different colors used to make fruit-flavored tablet candies. Draw a pencil line one centimeter from the bottom of a piece of chromatography paper. Use a few drops of water to dissolve each candy. Paint several drops of the color in a small spot on the line. Clean the brush and paint a different color of candy two centimeters from the first dot on the line. After you've placed all of the colors on the line, write the name of each candy color by the corresponding spot. Roll the paper into a cylinder, attach the ends using staples, and place in a beaker with water just touching the bottom of the paper. Take the paper out and analyze the color separation once the water runs up to within an inch from the top of the paper.
A leaf has several pigments that can be separated using chromatography. Grind finely cut leaves, along with a small pinch of sand and a solvent such as propanone, using a mortar and pestle for three minutes. Draw a pencil line three centimeters from the bottom of a strip of chromatography paper and use a fine glass tube to place seven spots of this leaf mixture on the line. Wait for each spot to dry before adding another one directly on top of the previous one. Place the bottom edge of the paper in a beaker with propanone just covering the bottom. Remove the paper when the propanone is near the top or has stopped moving up the paper. Because propanone is highly flammable, wear protective goggles when doing this experiment.
Food Coloring
Although commercial food colorings may seem like they're a single color, they're actually made up of a combination of dyes that can be separated using chromatography. Draw a pencil line across the bottom of a chromatography paper strip, two centimeters from the bottom. Place spots of food coloring on the line, making sure the colors are concentrated in a small area and at least three centimeters apart. Dissolve 100 milligrams of table salt into 100 milliliters of water and pour just enough of this mixture to cover the base of the beaker or jar. Wrap the paper into a cylinder shape and secure it with a staple before placing it in the beaker. Remove the paper from the beaker when the solution has moved to within two centimeters from the top.
- Science Project Lab: Paper Chromatography Experiments
- Royal Society of Chemistry: 'Smarties' Chromatography
- Royal Society of Chemistry: Chromatography of Leaves
Cite This Article
Battaglia, Gina. "Simple Chromatography Experiments" sciencing.com , https://www.sciencing.com/simple-chromatography-experiments-9589/. 24 April 2017.
Battaglia, Gina. (2017, April 24). Simple Chromatography Experiments. sciencing.com . Retrieved from https://www.sciencing.com/simple-chromatography-experiments-9589/
Battaglia, Gina. Simple Chromatography Experiments last modified March 24, 2022. https://www.sciencing.com/simple-chromatography-experiments-9589/
Recommended

- Science Notes Posts
- Contact Science Notes
- Todd Helmenstine Biography
- Anne Helmenstine Biography
- Free Printable Periodic Tables (PDF and PNG)
- Periodic Table Wallpapers
- Interactive Periodic Table
- Periodic Table Posters
- Science Experiments for Kids
- How to Grow Crystals
- Chemistry Projects
- Fire and Flames Projects
- Holiday Science
- Chemistry Problems With Answers
- Physics Problems
- Unit Conversion Example Problems
- Chemistry Worksheets
- Biology Worksheets
- Periodic Table Worksheets
- Physical Science Worksheets
- Science Lab Worksheets
- My Amazon Books
Leaf Chromatography Experiment – Easy Paper Chromatography

Leaf chromatography is paper chromatography using leaves. Paper chromatography is a separation technique. When applied to leaves, it separates the pigment molecules mostly according to their size. The main pigment molecule in green leaves is chlorophyll, which performs photosynthesis in the plant. Other pigments also occur, such as carotenoids and anthocyanins. When leaves change color in the fall , the amount and type of pigment molecules changes. Leaf chromatography is a fun science project that lets you see these different pigments.
Leaf Chromatography Materials
You only need a few simple materials for the leaf chromatography project:
- Rubbing alcohol (isopropyl alcohol)
- Coffee filters or thick paper towels
- Small clear jars or glasses with lids (or plastic wrap to cover the jars)
- Shallow pan
- Kitchen utensils
You can use any leaves for this project. A single plant leaf contains several pigment molecules, but for the most colors, use a variety of leaves. Or, collect several of each kind of leaf and compare them to each other. Good choices are colorful autumn leaves or chopped spinach.
Perform Paper Chromatography on Leaves
The key steps are breaking open the cells in leaves and extracting the pigment molecule and then separating the pigment using the alcohol and paper.
- Finely chop 2-3 leaves or several small leaves. If available, use a blender to break open the plant cells. The pigment molecules are in the chloroplasts of the cells, which are organelles encased within the plant cell walls. The more you break up the leave, the more pigment you’ll collect.
- Add enough alcohol to just cover the leaves.
- If you have more samples of leaves, repeat this process.
- Cover the container of leaves and alcohol and set it in a shallow pan filled with enough hot tap water to surround and heat the container. You don’t want water getting into your container of leaves.
- Replace the hot water with fresh water as it cools. Swirl the container of leaves around from time to time to aid the pigment extraction into the alcohol. The extraction is ready when the alcohol is deeply colored. The darker its color, the brighter the resulting chromatogram.
- Cut a long strip of coffee filter or sturdy paper towel for each chromatography jar. Paper with an open mesh (like a paper towel) works quickly, but paper with a denser mesh (like a coffee filter) is slower but gives a better pigment separation.
- Place a strip of paper into jar, with one end in the leaf and alcohol mixture and the other end extending upward and out of the jar.
- The alcohol moves via capillary action and evaporation, pulling the pigment molecules along with it. Ultimately, you get bands of color, each containing different pigments. After 30 to 90 minutes (or whenever you achieve pigment separation), remove the paper strips and let them dry.
How Leaf Chromatography Works
Paper chromatography separates pigments in leaf cells on the basis of three criteria:
- Molecule size
Solubility is a measure of how well a pigment molecule dissolves in the sol vent. In this project, the solvent is alcohol . Crushing the leaves breaks open cells so pigments interact with alcohol. Only molecules that are soluble in alcohol migrate with it up the paper.
Assuming a pigment is soluble, the biggest factor in how far it travels up the paper is particle size. Smaller molecules travel further up the paper than larger molecules. Small molecules fit between fibers in the paper more easily than big ones. So, they take a more direct path through the paper and get further in less time. Large molecules slowly work their way through the paper. In the beginning, not much space separates large and small molecules. The paper needs to be long enough that the different-sized molecules have enough time to separate enough to tell them apart.
Paper consists of cellulose, a polysaccharide found in wood, cotton, and other plants. Cellulose is a polar molecule . Polar molecules stick to cellulose and don’t travel very far in paper chromatography. Nonpolar molecules aren’t attracted to cellulose, so they travel further.
Of course, none of this matters if the solvent doesn’t move through the paper. Alcohol moves through paper via capillary action . The adhesive force between the liquid and the paper is greater than the cohesive force of the solvent molecules. So, the alcohol moves, carrying more alcohol and the pigment molecules along with it.
Interpreting the Chromatogram
- The smallest pigment molecules are the ones that traveled the greatest distance. The largest molecules are the ones that traveled the least distance.
- If you compare chromatograms from different jars, you can identify common pigments in their leaves. All things being equal, the lines made by the pigments should be the same distance from the origin as each other. But, usually conditions are not exactly the same, so you compare colors of lines and whether they traveled a short or long distance.
- Try identifying the pigments responsible for the colors.
There are three broad classes of plant pigments: porphyrins, carotenoids, and flavonoids. The main porphyrins are chlorophyll molecules. There are actually multiple forms of chlorophyll, but you can recognize them because they are green. Carotenoids include carotene (yellow or orange), lycopene (orange or red), and xanthophyll (yellow). Flavonoids include flavone and flavonol (both yellow) and anthocyanin (red, purple, or even blue).
Experiment Ideas
- Collect leaves from a single tree or species of tree as they change color in the fall. Compare chromatograms from different colors of leaves. Are the same pigments always present in the leaves? Some plants produce the same pigments, just in differing amounts. Other plants start producing different pigments as the seasons change.
- Compare the pigments in leaves of different kinds of trees.
- Separate leaves according to color and perform leaf chromatography on the different sets. See if you can tell the color of leaves just by looking at the relative amount of different pigments.
- The solvent you use affects the pigments you see. Repeat the experiment using acetone (nail polish remover) instead of alcohol.
- Block, Richard J.; Durrum, Emmett L.; Zweig, Gunter (1955). A Manual of Paper Chromatography and Paper Electrophoresis . Elsevier. ISBN 978-1-4832-7680-9.
- Ettre, L.S.; Zlatkis, A. (eds.) (2011). 75 Years of Chromatography: A Historical Dialogue . Elsevier. ISBN 978-0-08-085817-3.
- Gross, J. (1991). Pigments in Vegetables: Chlorophylls and Carotenoids . Van Nostrand Reinhold. ISBN 978-0442006570.
- Haslam, Edwin (2007). “Vegetable tannins – Lessons of a phytochemical lifetime.” Phytochemistry . 68 (22–24): 2713–21. doi: 10.1016/j.phytochem.2007.09.009
- McMurry, J. (2011). Organic chemistry With Biological Applications (2nd ed.). Belmont, CA: Brooks/Cole. ISBN 9780495391470.
Related Posts
“Chromatography at home” experiment
How to separate mixtures with the help of paper and alcohol
Everyone knows about dog races, and even cockroach races. But have you ever seen dyes competing for speed? Get some popcorn and invite your friends around – it’s time to place your bets!
Safety precautions
Work in a well-ventilated room and in protective glasses. Observe safety rules when working with concentrated ethanol.
Warning! Only under adults supervision.
Reagents and equipment:
- black and blue markers;
- 96% ethanol;
- sheet of thick paper;
Step-by-step instructions
Take a small sheet of thick paper which can fit in a beaker. Make three dots on the paper with markers : black, blue, and a mixture of colors (black + blue). To make the dots on the same level, draw a starting line with a pencil first. Now lower the paper in the beaker with ethanol , about half a centimeter from the bottom. Then seal the beaker, so the ethanol doesn’t evaporate. After half an hour, observe the movement and separation of colors on the paper.
Processes description
Chromatography is a method for analyzing substances by their separation into components. The method was discovered by Mikhail Tsvet, who separated color pigments of plants . In our experiment, we must select the solvent which is contained the markers. This is usually ethanol.
Due to the capillary effect, the ethanol soaks the paper evenly, taking the dyes with it. The dyes in the mixture react differently with the alcohol, so they rise at different speeds.
Separation is based on this difference in speed.
Dozens of experiments you can do at home
One of the most exciting and ambitious home-chemistry educational projects The Royal Society of Chemistry

Simple Paper Towel Chromatography Experiment for Kids
One of my favourite experiments to do with the younger students when I taught secondary school science was Chromatography – of course in my lab I had all of the equipment I needed including filter paper, different mixed up inks and solvents to use. But it’s so easy to do at home and my kids were fascinated by this very simple Kitchen Science experiment, science at home is so much fun and we’re taking part in the A to Z of science organised by Frogs Snails and Puppy Dog Tails this month check out all of the details for more at home science with kids.
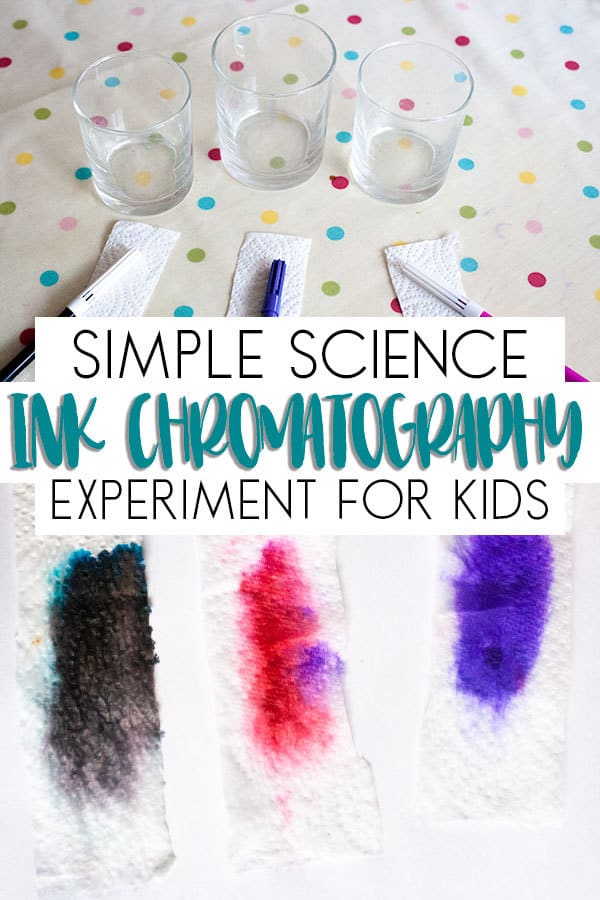
When we were painting the kids asked for black paint and unfortunately we had run out of it and that we could mix it up – I said yes but it’s not easy to make as black isn’t really a colour and neither is white so I set about proving it to them with a black pen to see what colours it was actually made up of.
What You'll Find on This Page
Materials needed for this Simple Chromatography Experiment
Paper Towel
Water Soluble Marker Pen (any washable marker) – black plus other colours of your child’s choice
How to do this Paper Towel Chromatography Experiment

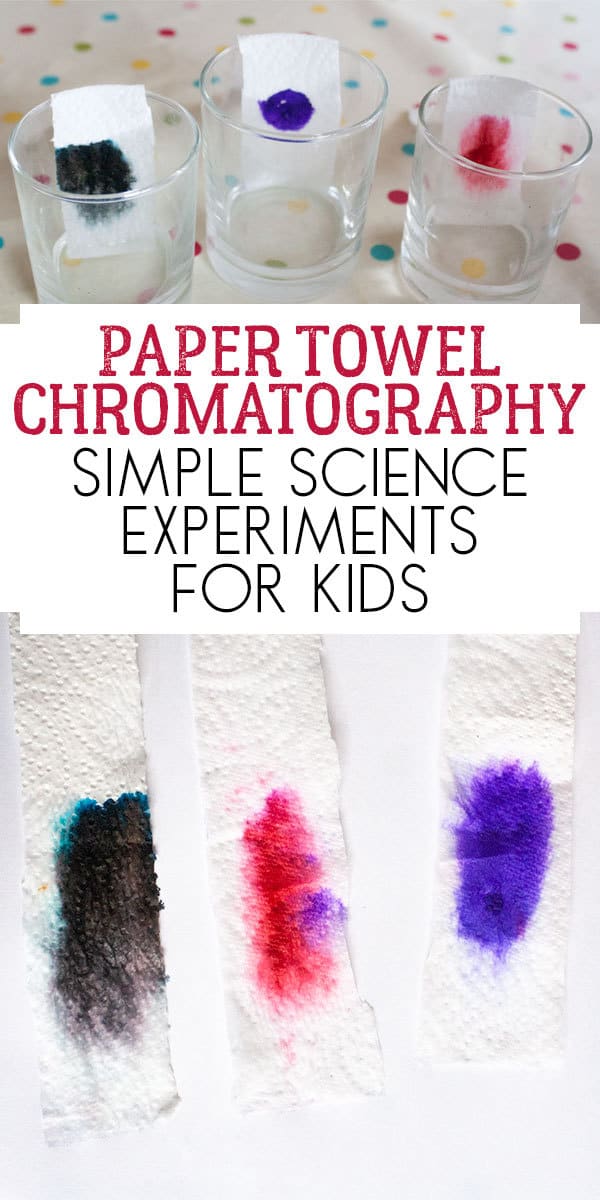
With a kitchen paper towel we cut up 3 strips and selected 3 different coloured marker pens – a black plus a pink and a purple.
I explained that we were going to split the ink in the pens into the different colours that it was made of using a method called chromatography and then I asked what they thought would happen. My eldest said that the pink would split into a white and a red cause that’s what made pink, the younger one joined in and suggested that purple would be red and purple. But black was black and from trying to make the colour with their paints they couldn’t do it.

On the strips of paper towel I drew a circle around an inch from the bottom for them to colour in with the different colours and filled up a glass with around 1/4 inch of water.
They then put the paper towel into the water – make sure that you don’t let the ink spot touch the water and we folded the paper over the glass to hold it in place.

As we watched the water travelled up the paper towel through the ink spot – as it went up through the ink spot it split the colours that made up the different inks and headed up the paper.

When the ink had travelled to the paper at the top of the glass we removed it and placed it on a sheet of white paper to dry and then looked at the colours.
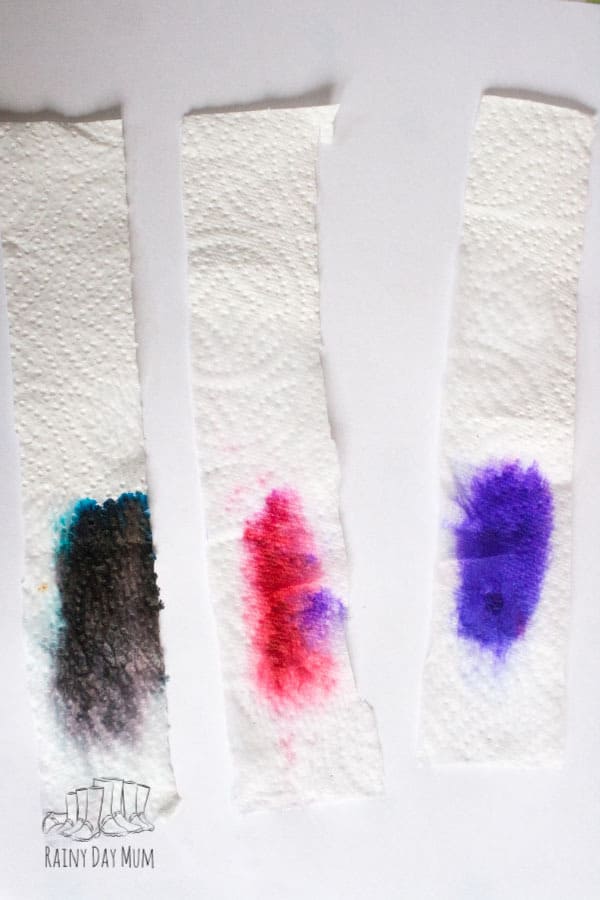
The Purple ink was a true purple, the pink was made up of different colours of pink and red that travelled different distances but the black ink was the most revealing and the kids loved looking at the dried paper towel.
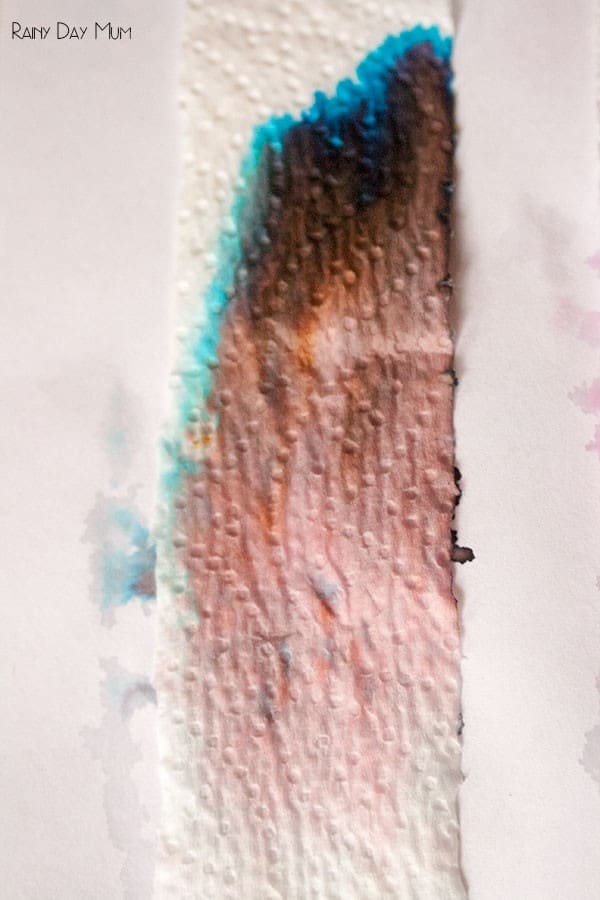
How Chromatography works
As I said I used to teach this with my secondary school students – using different ink mixes – black ink works really well as an example because it is made up of different colours – each of the colours has a different polar value.
With paper Chromatography, the paper is non-polar none reactive to the water solvent as it is made up of cellulose. When the ink meets the water the more polar the colour is further it will travel through the paper in our example the red is the least polar staying near to where the black spot was – the yellow the next and then the blues most polar travelling up the furthest from the black spot.
Try these other easy Science Experiments to do at Home
Growing Crystals without Borax
Exploring Plant Structure with Celery
Seeing how roots grow with beans in a jar experiment
Testing Materials – what makes balls bounce
Energy transfer with a cotton reel car
Viewing the Constellations – with a show box viewer
Exploring how colours are made (no mess experiment using light)
Sea Turtle Conservation Lessons away from the Beach
A great extension of the experiment is to collect all of the different makes of black ink washable markers that you have in the house and repeat the experiment to see what different colours each of the inks are made from.

Don’t forget to check out the rest of the A to Z of Science Experiments for kids at Frogs and snails and puppy dog tails.
Pin this Simple Paper Towel Chromatography Experiment to Do Later
One Comment
What a brilliant idea, I’m going to show my kids this in the week.
Leave a Reply Cancel reply
Your email address will not be published. Required fields are marked *
Save my name, email, and website in this browser for the next time I comment.
This site uses Akismet to reduce spam. Learn how your comment data is processed .
- Skip to primary navigation
- Skip to main content
- Skip to primary sidebar
The Chaos and the Clutter
Easy Science for Kids – Chromatography
By Sharla Kostelyk
(This post may contain affiliate links. For more information, see my disclosure policy .)
Science is not my favourite subject to teach. To be honest, it’s hard to even wrap my brain around some of the more advanced concepts so other than nature studies and Science Fair projects, we do very little science in our homeschooling. Last weekend, our girls were invited to a birthday party with a science theme. The birthday girl’s dad is a friend of mine who is a high school Physics teacher and he is PASSIONATE about SCIENCE! I stayed and watched and I have to admit that his enthusiasm was infectious and by the end of the party, I began to believe that maybe science could be fun and that maybe I could be capable of teaching it.
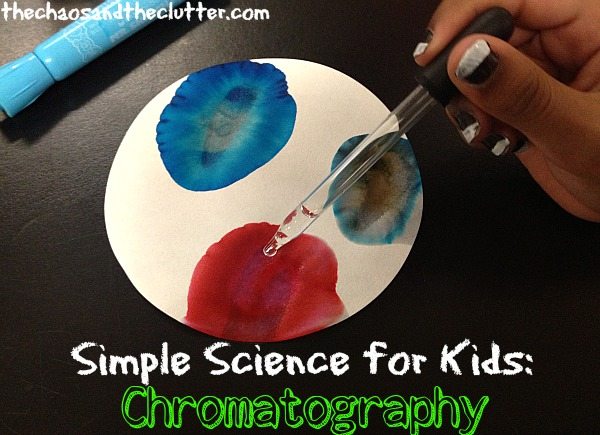
One of the hands-on activities he had the kids do was a lesson in chromatography and it was one that I later repeated with all my kids at home. This easy science demonstration can be done with materials you likely have in your home already.
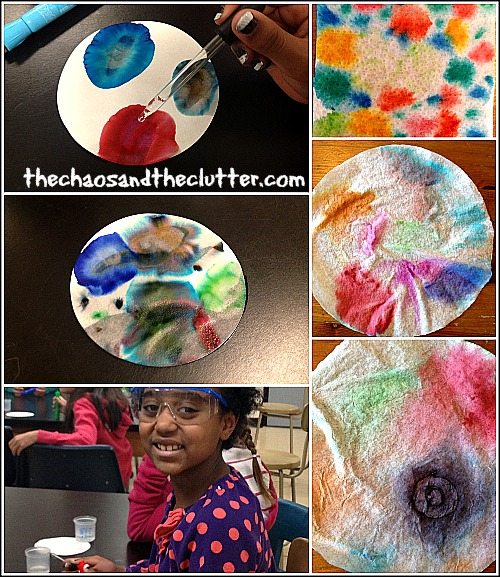
All that you need for this experiment is filter paper , markers, droppers, and water. It does works best on filter paper but you can also use coffee filters or paper towels. We tried with each of these and they all work well enough to demonstrate the principle, although filter paper did give the most clear results. For the water, we used droppers, a spray bottle and a paintbrush and all of them worked equally well for distribution of water.
Have the kids colour an area on the filter paper and then add a few drops of water to that area. Have them observe what happens to the colour. They will be able to see that not only does the colour spread, it separates into the colours that make up that particular colour. Be sure to have them try using a black marker as it separates into several colours.
If you are looking for more easy science ideas, you may want to follow my Simple Science board on Pinterest.

IMAGES
VIDEO
COMMENTS
Lower the chromatography strip into the water. Keeping your chromatography strip vertical, lower it into the water. Make sure that you have an apparatus set up to hold the strip there, as this process can take quite a bit of time. The bottom of the strip should be submerged, but the marker line should not be submerged.
This simple felt tip pen paper chromatography experiment is a great way to learn about this particular method of separating mixtures. WHAT IS CHROMATOGRAPHY? Chromatography is a technique used to separate mixtures. Information from a chromatography investigation can also be used to identify different substances.
Chromatography is a method you can use to separate and analyze the individual components of complex mixtures, ranging from ink to amino acids to vapors. Chromatography requires a stationary phase as an immovable platform that the mobile phase -- the water or other solvent to carry the mixture to be separated -- moves through. Porous household papers like paper towels and coffee filters make an ...
Leaf chromatography is a fun science project that lets you see these different pigments. Leaf Chromatography Materials. You only need a few simple materials for the leaf chromatography project: Leaves; Rubbing alcohol (isopropyl alcohol) Coffee filters or thick paper towels; Hot water; Small clear jars or glasses with lids (or plastic wrap to ...
Reagents and equipment: black and blue markers; 96% ethanol; sheet of thick paper; beaker; lid. Step-by-step instructions. Take a small sheet of thick paper which can fit in a beaker. Make three dots on the paper with markers: black, blue, and a mixture of colors (black + blue).To make the dots on the same level, draw a starting line with a pencil first.
Chromatography is the separation of a mixture by passing it in solution or suspension or as a vapor through a medium in which the components move at differe...
This is an example of column chromatography, which uses different chemicalcharacteristics — pH, sa... In this activity, we separate two different colors of ink.
How to do this Paper Towel Chromatography Experiment With a kitchen paper towel we cut up 3 strips and selected 3 different coloured marker pens - a black plus a pink and a purple. I explained that we were going to split the ink in the pens into the different colours that it was made of using a method called chromatography and then I asked ...
This video shows a paper chromatography experiment conducted to separate the different pigments present in a wet erase marker.SUBSCRIBE: https://tinyurl.com...
One of the hands-on activities he had the kids do was a lesson in chromatography and it was one that I later repeated with all my kids at home. This easy science demonstration can be done with materials you likely have in your home already. All that you need for this experiment is filter paper, markers, droppers, and water. It does works best ...